Audio tools: stems, mastering, transcription and voice check
Split a song into stems, master a track for streaming or against a reference, turn speech into text with speaker labels, and check whether a voice recording is genuine.
The tools at a glance
Besides creating sound, Audio & Voice AI has four tools that work on a file you already have. They share the same pattern: drop in a file, choose settings, run, then find the result in the tool's History. A fifth tool in the Voice group, AI Separation, splits a recording into dialogue and background.
| Tool | What it does | Input |
|---|---|---|
| Separation | Splits a mix into 2, 4, 5 or 6 stems | MP3, WAV, FLAC, OGG or M4A, up to 200 MB |
| Mastering | Sets loudness and tone for streaming, radio or podcast, or matches a reference track | MP3, WAV, FLAC, OGG or M4A, up to 200 MB |
| Transcription | Turns speech into text, with speaker labels and a PDF report | MP3, WAV, M4A, OGG or MP4 |
| Verification | Analyses a voice recording for signs of AI synthesis or editing, and can compare two voices | MP3, WAV, FLAC, OGG or M4A, up to 200 MB |
Separation: split a song into stems
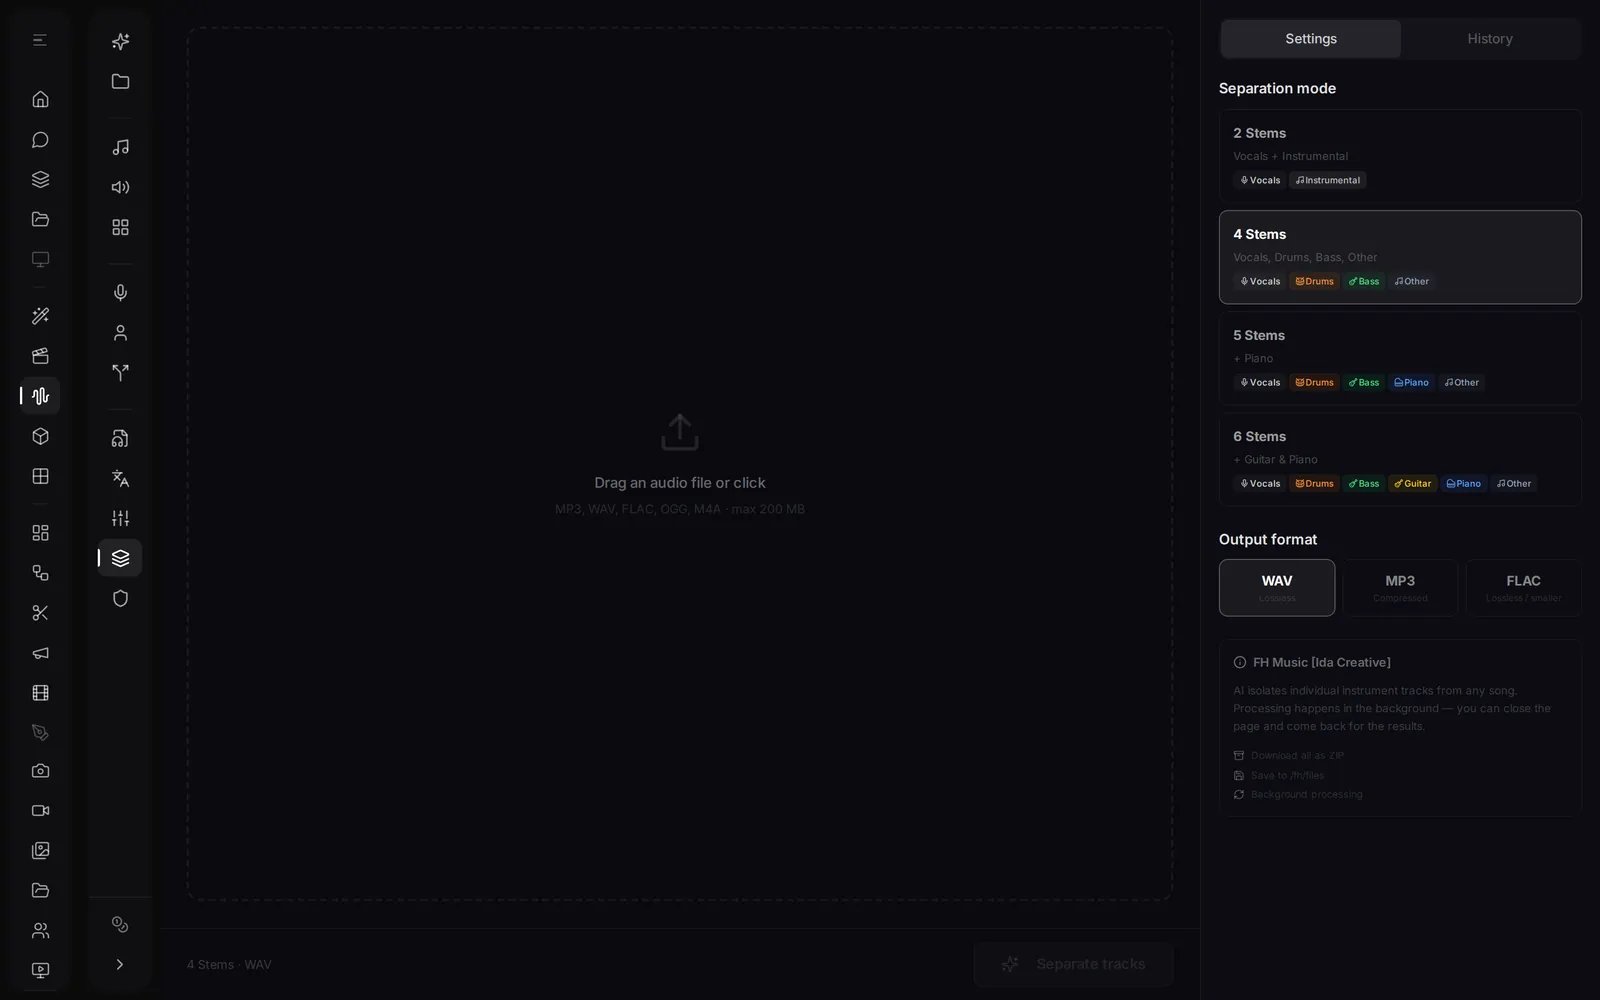
Open Separation under Tools. Drag an audio file onto the drop area or click it. In Settings choose the Separation mode and the Output format, then click Separate tracks.
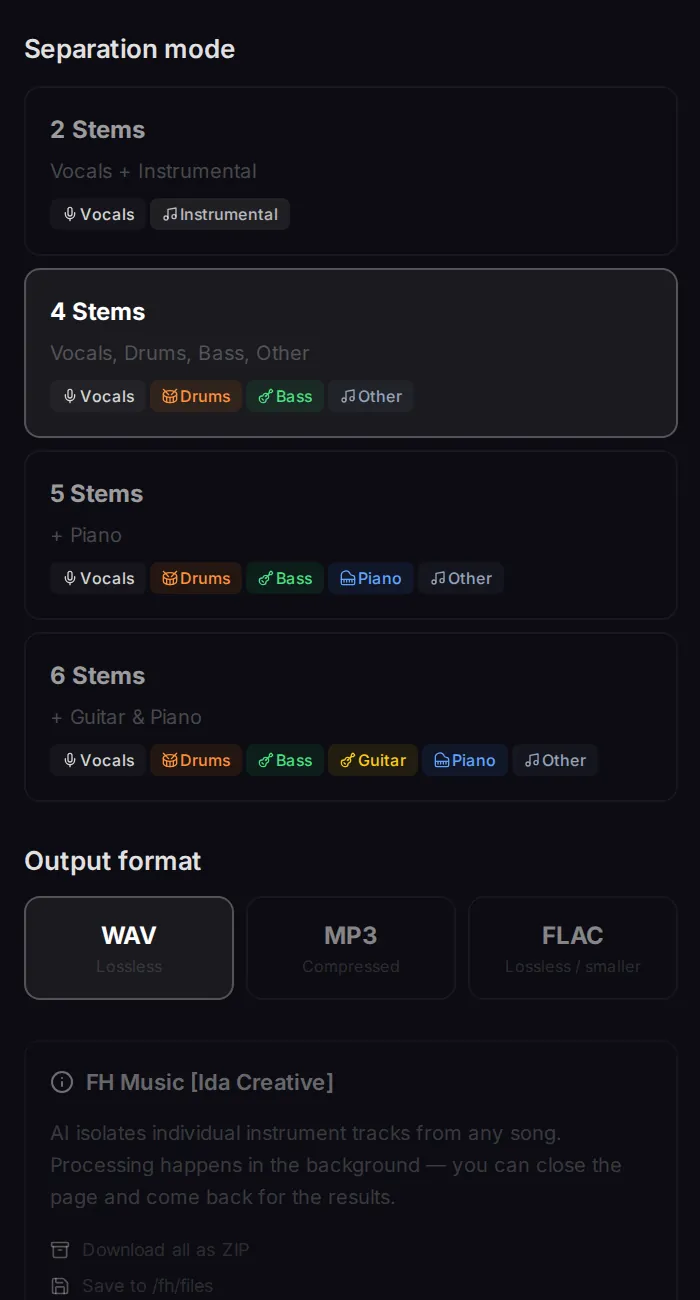
| Mode | You get |
|---|---|
| 2 Stems | Vocals and Instrumental |
| 4 Stems | Vocals, Drums, Bass, Other |
| 5 Stems | Vocals, Drums, Bass, Piano, Other |
| 6 Stems | Vocals, Drums, Bass, Guitar, Piano, Other |
- Output format: WAV (lossless), MP3 (compressed) or FLAC (lossless, smaller).
- Background processing: the job runs on our servers. You can close the page and come back; the result is in History.
- When it is done: play each stem, click Download ZIP, or Save to Files to keep them in Files.
- Studio Music: you can also select a clip in the workstation and split it into stems there (Split into tracks); the stems land on new tracks.
Mastering: finish the loudness
Open Mastering. Two tabs at the top: Preset mastering and Match a reference track.
Preset mastering
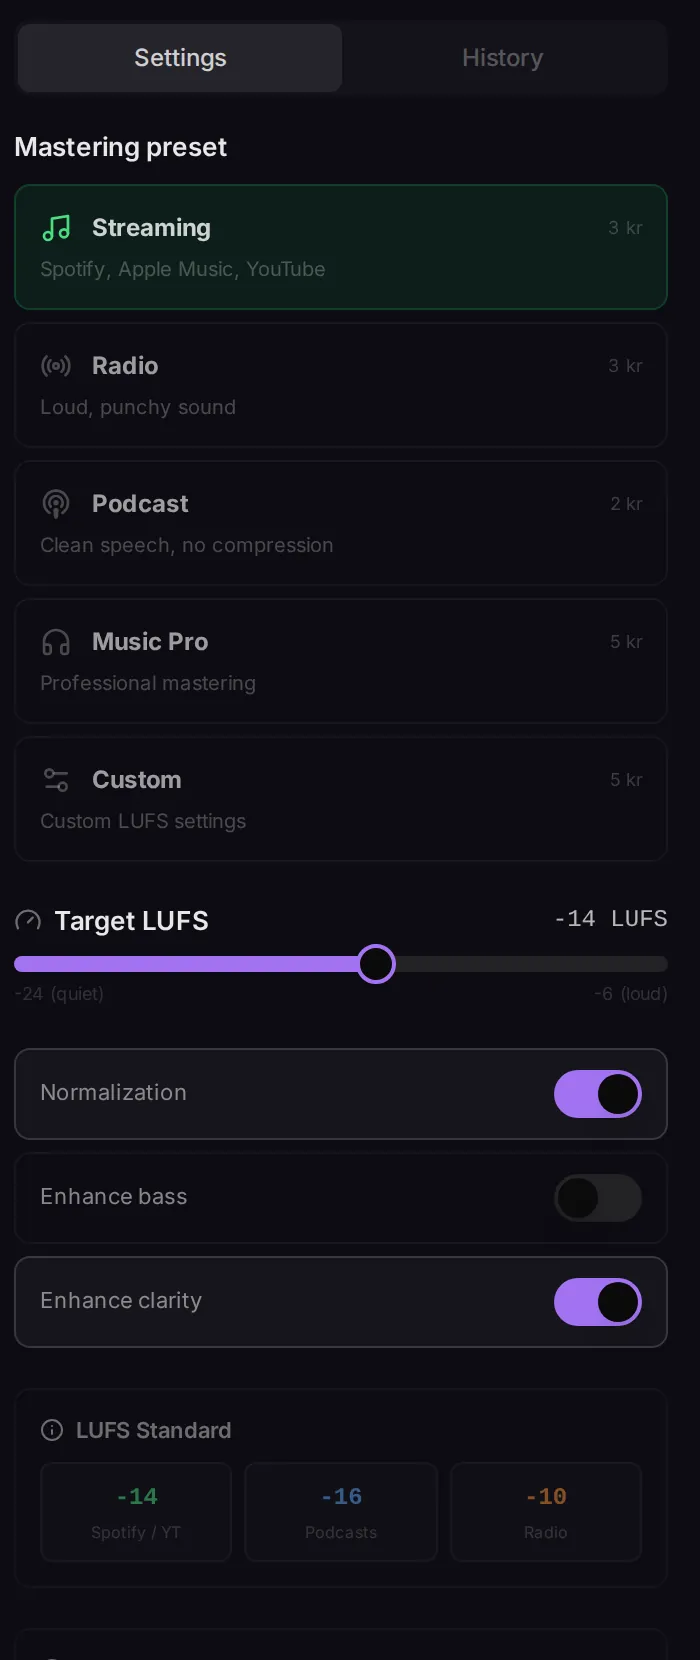
| Preset | For |
|---|---|
| Streaming | Spotify, Apple Music, YouTube. Loudness target -14 LUFS. |
| Radio | Loud, punchy sound. |
| Podcast | Clean speech, no compression. |
| Music Pro | Professional mastering. |
| Custom | Your own target: Target LUFS from -24 (quiet) to -6 (loud), with Normalization, Enhance bass and Enhance clarity. |
Pick a preset, drop your file and click Master audio. Each preset shows its price. The history keeps the loudness before and after, shown as input and output LUFS.
Match a reference track
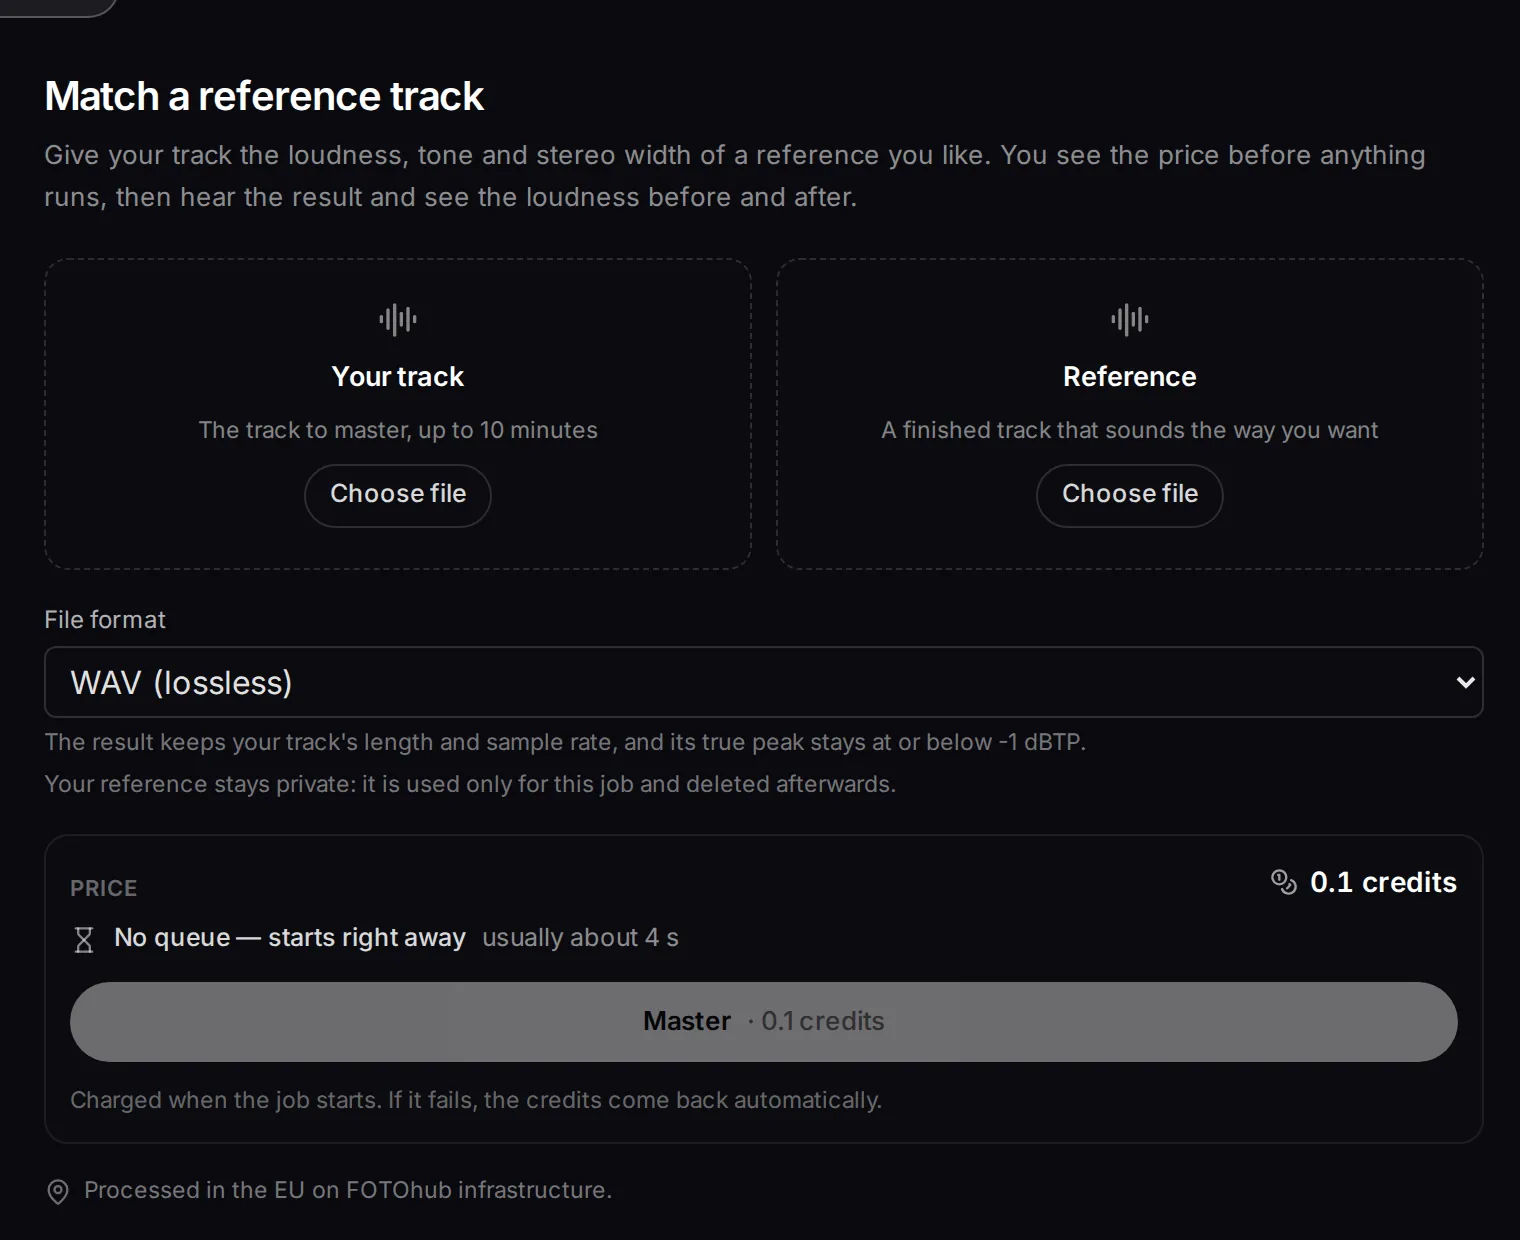
- Choose your track The track to master, up to 10 minutes.
- Choose a reference A finished track that sounds the way you want. It stays private, is used only for this job and is deleted afterwards.
- Pick the file format Choose WAV (lossless), FLAC (lossless, smaller) or M4A (AAC, smallest). The result keeps your track's length and sample rate, and its true peak stays at or below -1 dBTP.
- Master Click Master. The page shows the price before anything runs, then lets you hear the result and see the loudness before and after. If the job fails, you are refunded.
Transcription: speech to text
Open Transcription. Drop an audio or video file (MP3, WAV, M4A, OGG, MP4), or click From library to pick something you already have. Choose an engine: Forensic Audio PRO (speaker labels, emotions, PDF report) or a second, faster engine that returns word-level timestamps and shows its price per minute beside its name. Set the recording language or leave it on Auto, then click Analyze. The forensic result tells who speaks and when, line by line, and can be exported as a PDF report. More than thirty languages are supported.
- Speaker labels: each speaker is marked (spk_0, spk_1 in the report) with a time stamp for every line.
- Analysis configuration: the settings button next to Analyze opens switches for Emotion Analysis, Speaker Recognition, Background Analysis, Verification, Forensic Mode, In background (keep working while it runs), Auto-save (save the result to the library) and Branding (a logo in the report).
- History keeps your transcripts with their language and date, and you can search them.
Verification: is this voice genuine?
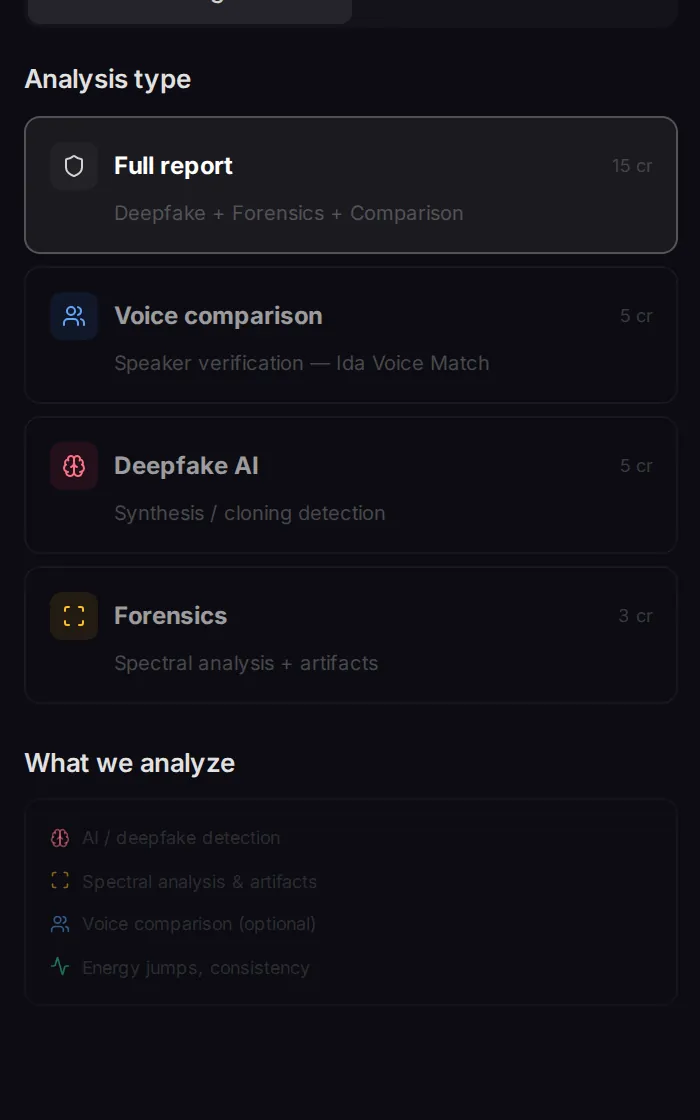
Open Verification. Drop a voice recording as the Primary file and choose an Analysis type in Settings, then click Analyze. Voice comparison needs a second file as the Reference; for a Full report it is optional. A Similarity threshold slider (Strict, Standard, Lenient) sets how close two voices must be to count as the same speaker.
| Analysis | What it checks |
|---|---|
| Full report | Deepfake detection, forensic analysis and, if you add a reference, voice comparison together |
| Voice comparison | Whether two recordings are the same speaker, with a similarity score |
| Deepfake AI | Whether the voice looks synthesised or cloned |
| Forensics | Spectral analysis and traces of editing, splicing or compression |
Limits and fixes
- My file is rejected.
- Check the format and the size limit shown under the drop area (200 MB for separation, mastering and verification).
- Separation takes a long time.
- Long songs and more stems take longer. The job runs in the background, so you can leave the page.
- The mastered file sounds quieter than the original.
- The original may have been louder than the target. Streaming presets bring a loud track down to about -14 LUFS so services do not turn it down for you.
- Where are my results?
- In each tool's History and in the audio library: Audio & Voice AI, History.