Getting started with FOTOhub
Create your account, find your way around the dashboard and make your first AI image in about two minutes, with no prior knowledge needed.
What FOTOhub is, in one minute
FOTOhub is a workspace in your browser where you can make images, videos, music and voice, edit photos, design layouts, automate repeated work and store the results, all in one account. You describe what you want in words, and the AI makes it. You then keep working on the result inside FOTOhub, in an editor, or send it on to another tool.
You do not need to install anything, and you do not need to know anything about AI. This guide takes you from nothing to your first picture. If a word is new, it is explained where it first appears.
- A prompt is the sentence you type to describe what you want.
- A generator is a page that turns a prompt into an image, a video or audio.
- A credit (written cr) is the unit you pay with. Every action shows its price before it runs.
- A model is the AI engine behind a generator. You can start without choosing one.
Create your account
Open fotohub.app/register. Signing up is free and takes about a minute.
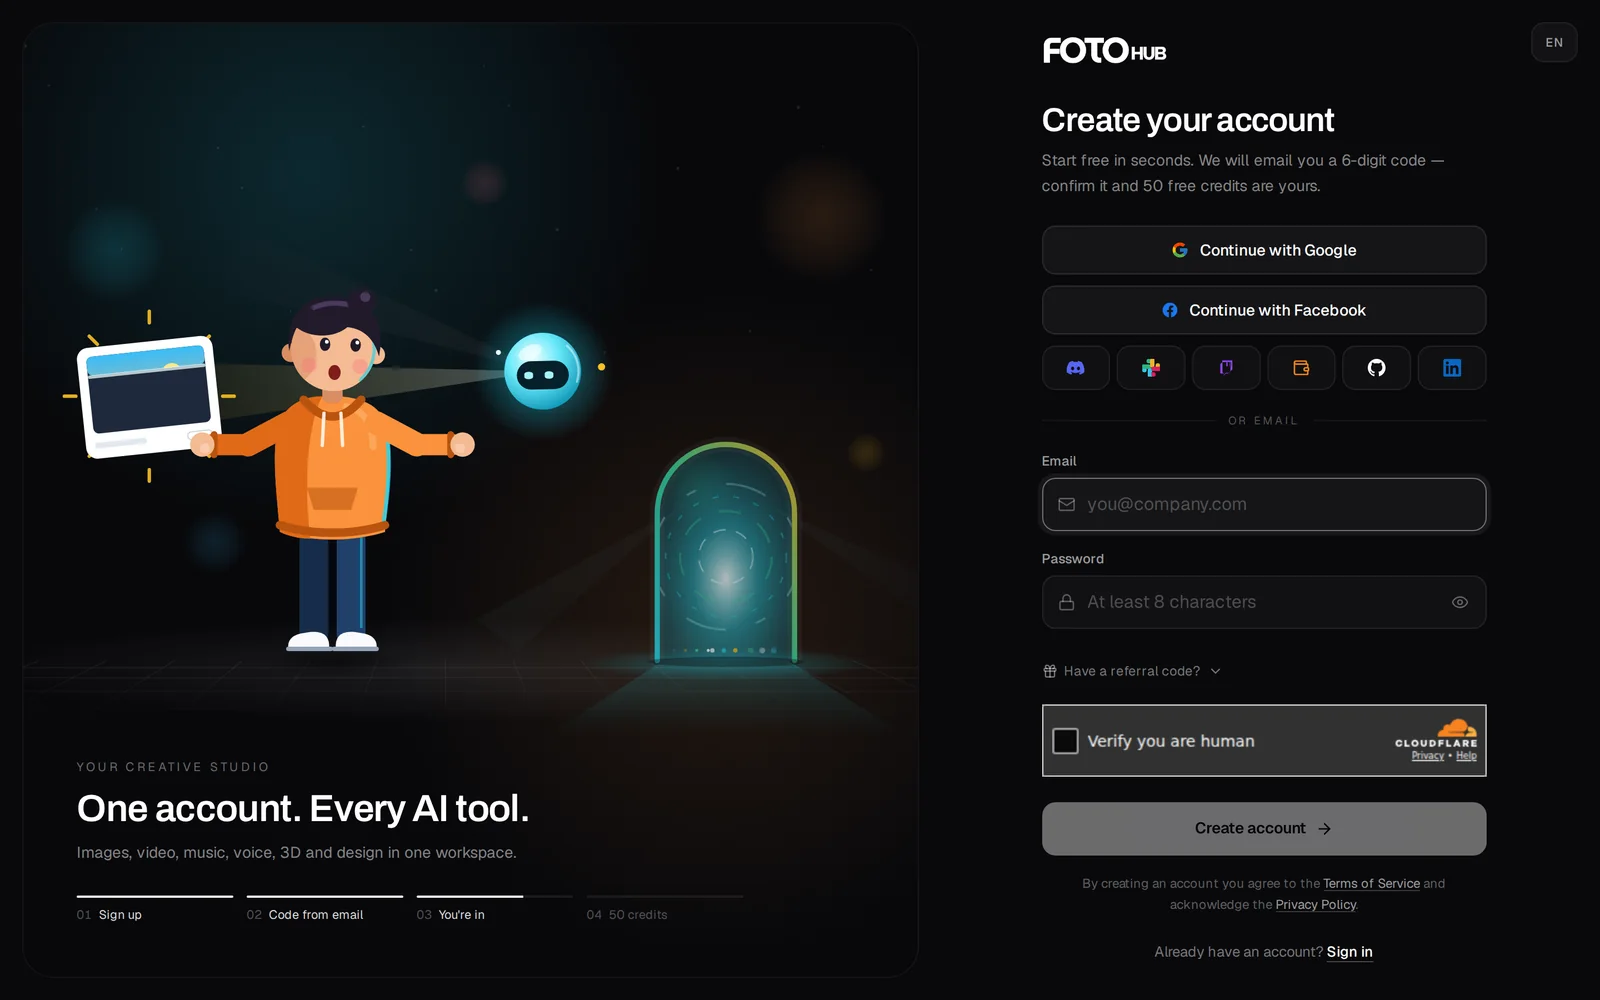
- Choose how to sign up The quickest way is Continue with Google: one click, and your email is confirmed straight away. Other sign-in buttons for Facebook and further services are shown as small icons. Or use an email and a password.
- Enter your email and a password Type your email. The page checks it as you type and tells you if an account already exists or if the address is a disposable one, which is not allowed. The password needs at least 8 characters. The coloured bar under it, from Weak to Strong, is advice, and a longer mixed password is stronger.
- Have a referral code? Open the small link If a friend gave you a code, click Have a referral code? and type it. If you came through a link with the code in it, the field is already filled. You can skip this step.
- Press Create account You agree to the Terms of Service and the Privacy Policy by pressing the button. A short automatic security check runs in the background.
- Type the 6-digit code from your email The page changes to Check your email. Open the message, copy the 6-digit code and type it into the box. The code works as soon as you type the sixth digit. No email? Look in your spam folder, wait for the countdown and press Send a new code, or press Use a different email.
- You are in A message says your email is confirmed and your free credits are on your account, and the dashboard opens.
Signing in later
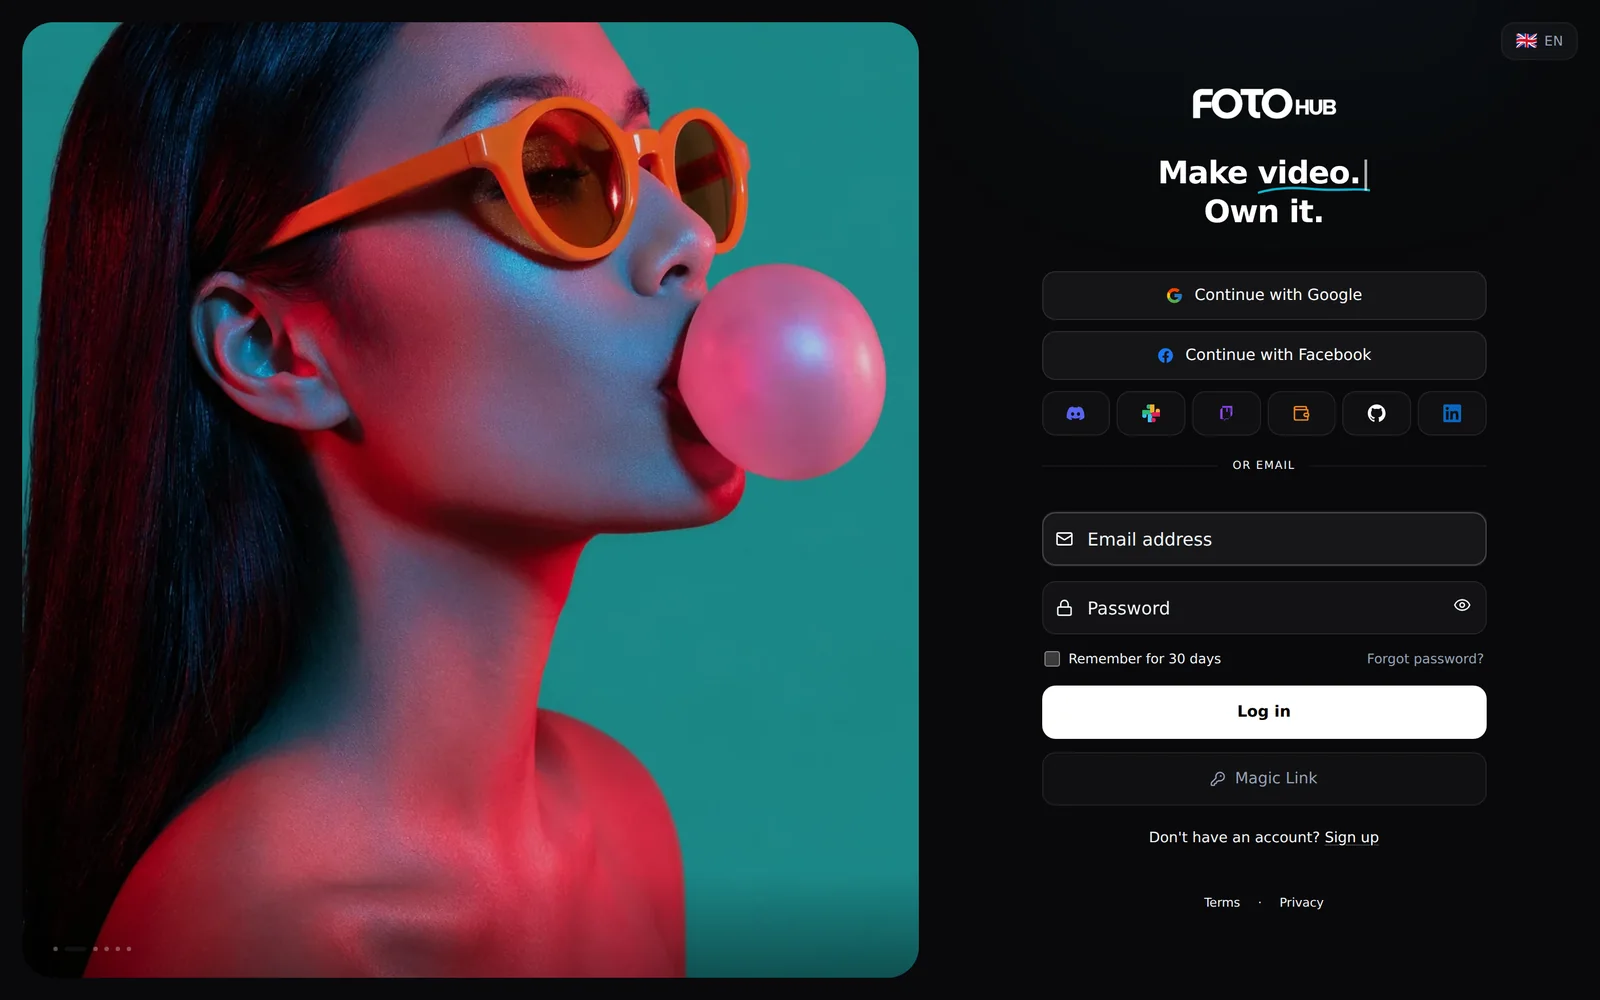
| Way to sign in | How it works |
|---|---|
| Email and password | Fill both fields and press Log in. Tick Remember for 30 days on your own computer to stay signed in. |
| Magic Link | Press Magic Link, enter your email and open the one-time link we send. No password is needed. The link is valid for 60 minutes. |
| Google and other buttons | Press the button. Your whole browser tab goes to the provider and comes back signed in. |
| Forgot password? | Enter your email and press Send instructions. The link in the email is valid for 60 minutes. |
| Two-step code | If you turned on an authenticator app, you type a 6-digit code after the password. |
Your first look at the dashboard
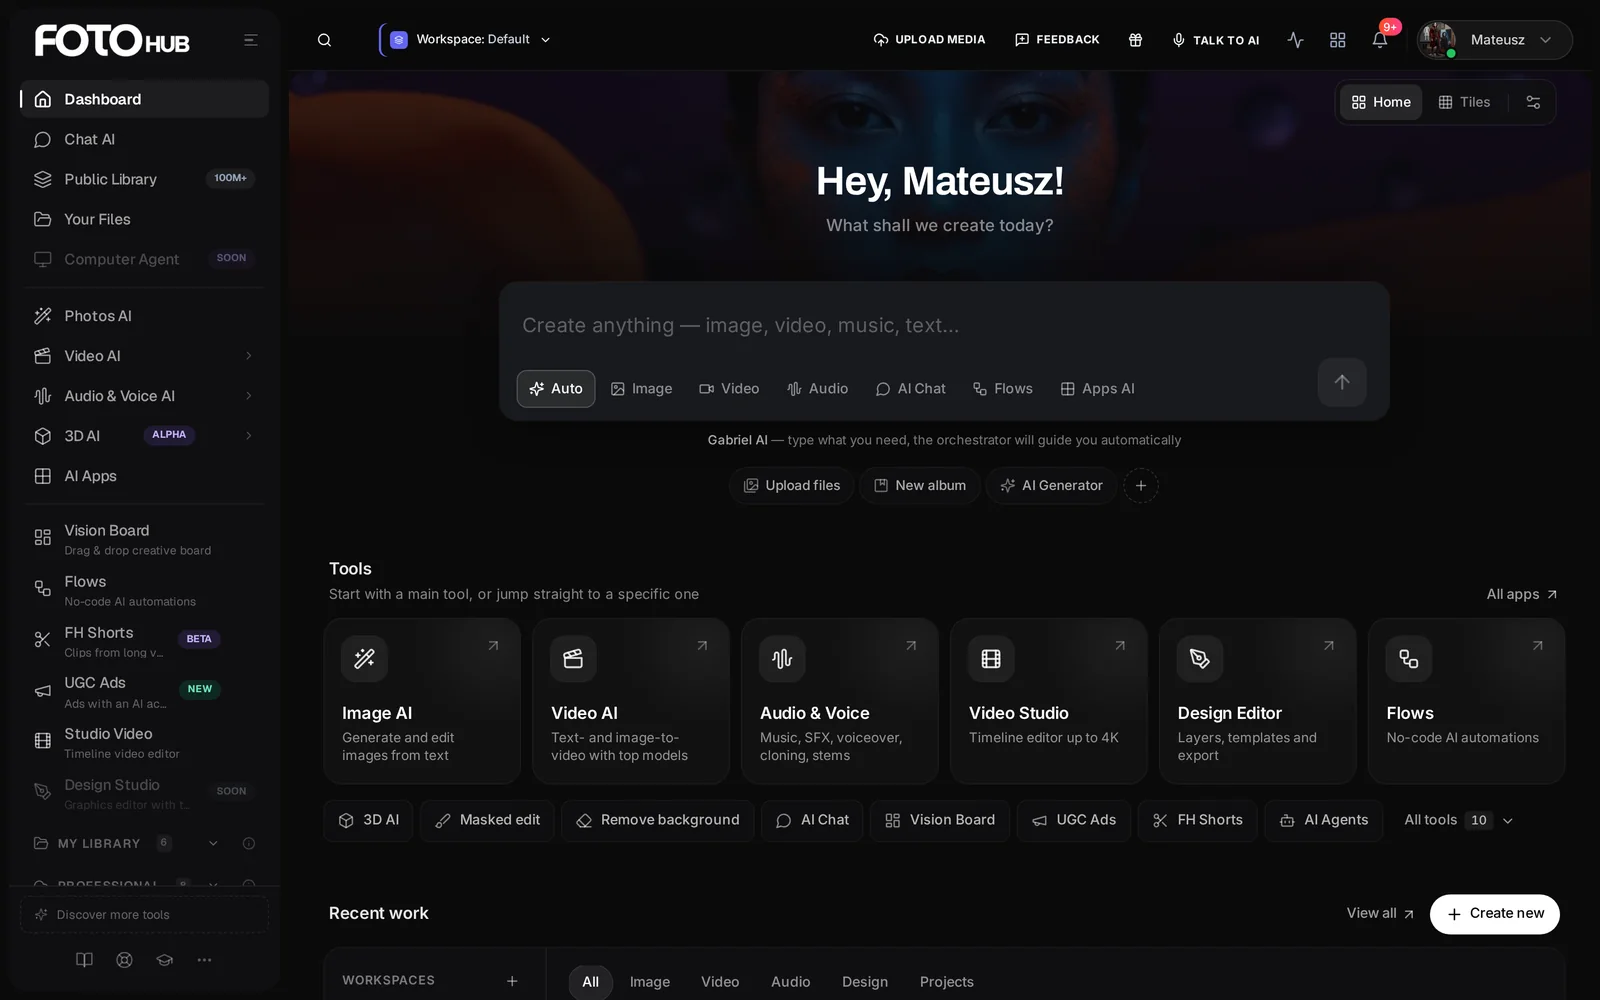
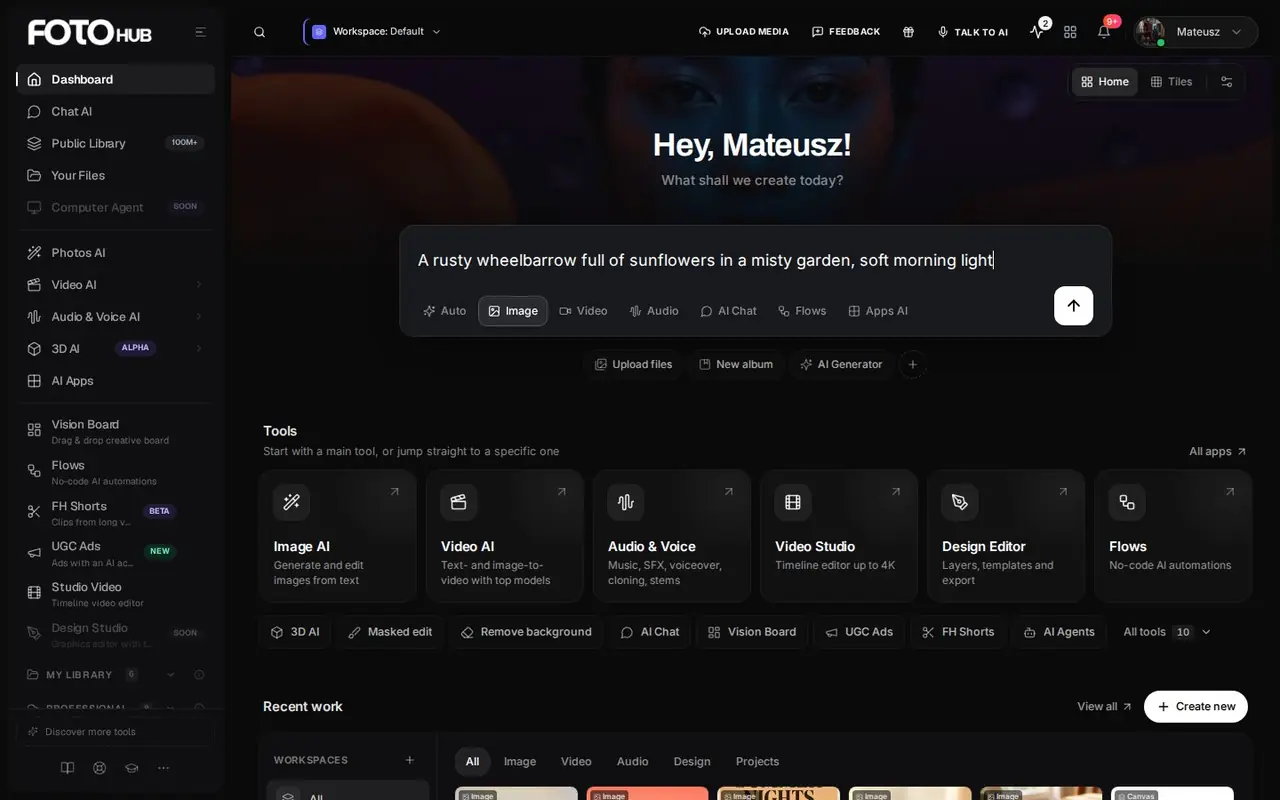
After sign-in you land on the Dashboard. This is home. Everything else in FOTOhub is one or two clicks from here.
- The sidebar on the left lists every tool. It is explained in the section Where everything is below.
- The greeting changes with the time of day. If you signed up with email and gave no name, it just says hello.
- The prompt box is the big field in the middle. Under it are seven mode buttons: Auto, Image, Video, Audio, AI Chat, Flows, Apps AI.
- Shortcuts under the box start with Upload files, New album and AI Generator. The plus button adds your own.
- Tools lists the main generators and editors as tiles.
- Recent work shows what you made lately, with filters for image, video, audio, design and projects.
Home and Tiles
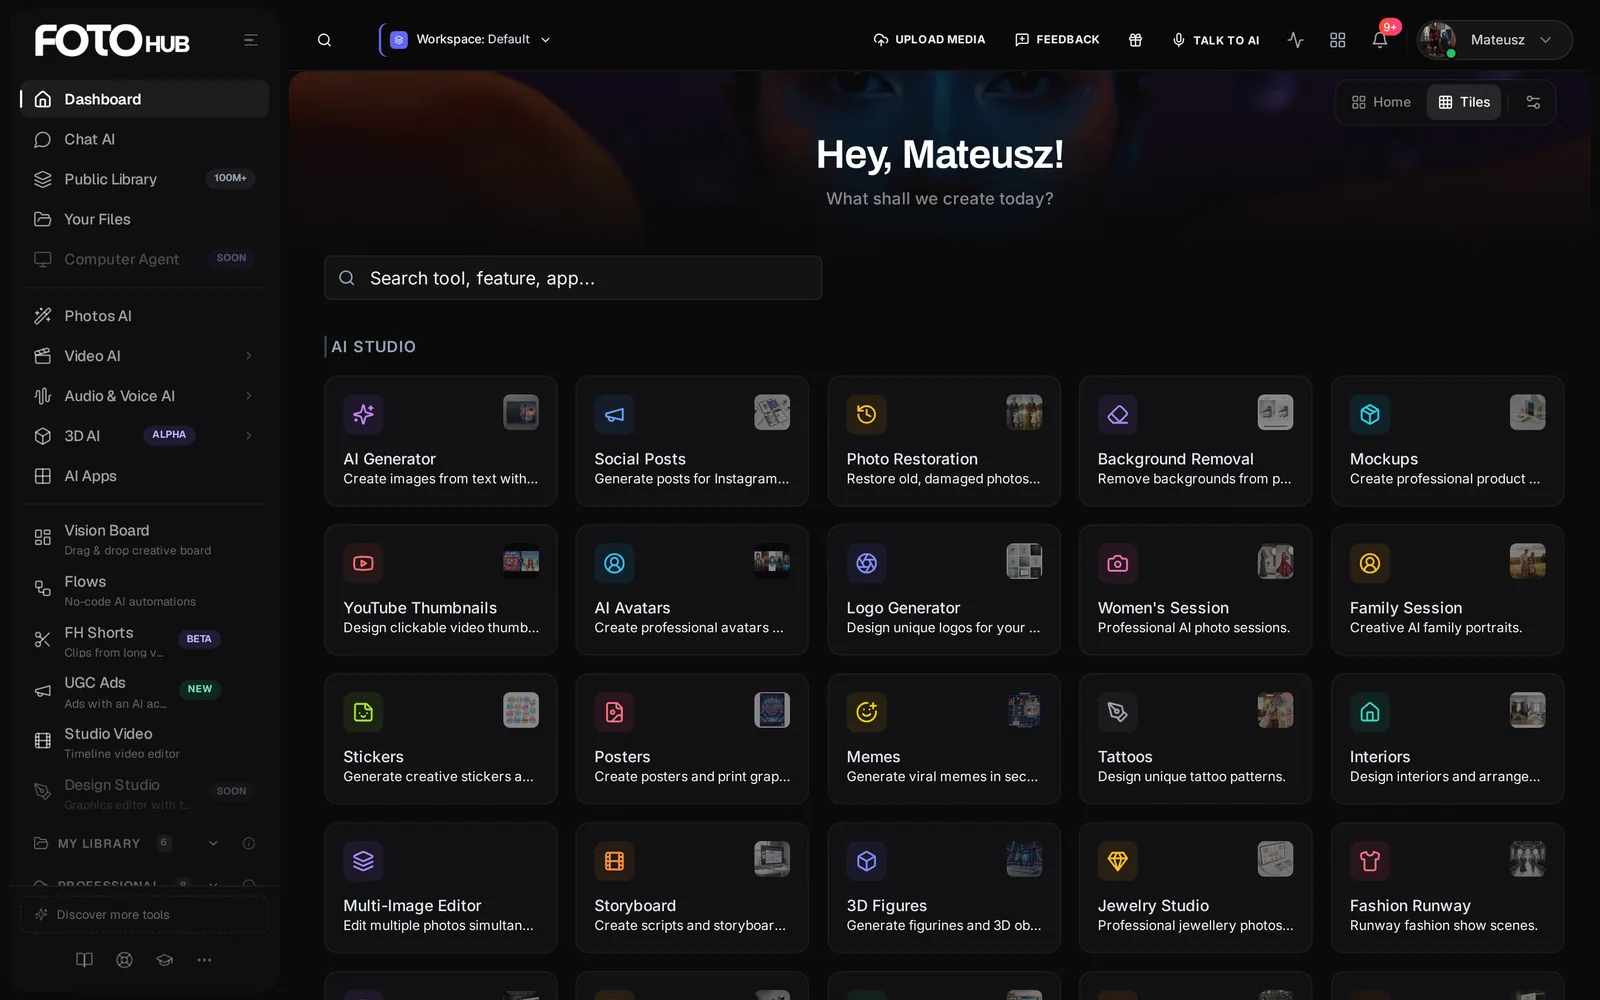
The two-part switch at the top right of the dashboard flips between Home, which you see above, and Tiles, a searchable wall of every tool and app grouped by category. If you like to browse, switch to Tiles and type in its search box.
The Tools row
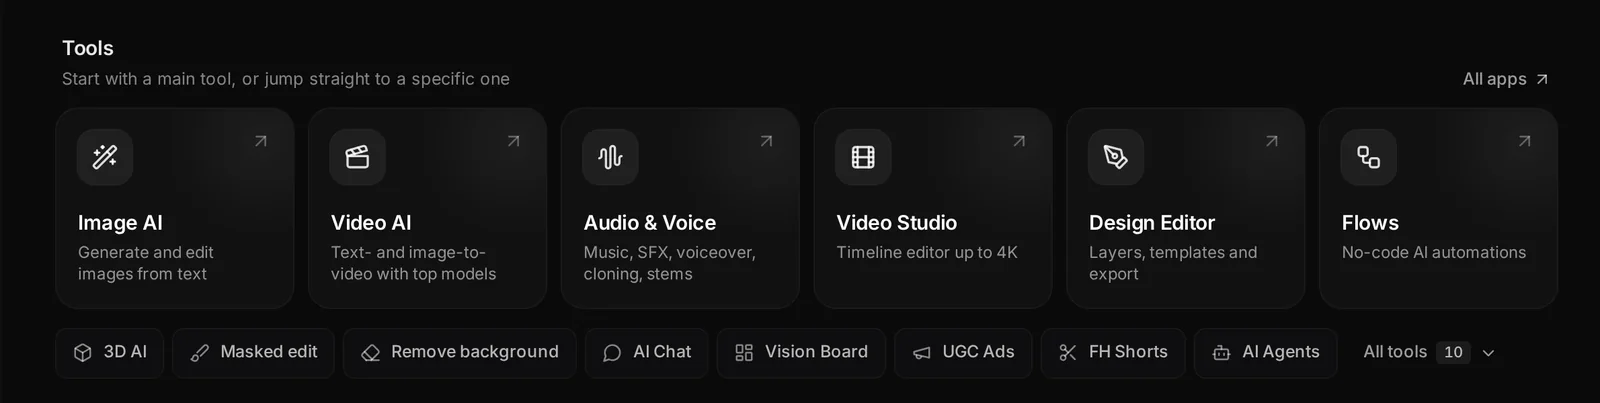
The big tiles are Image AI, Video AI, Audio & Voice, Video Studio, Design Editor and Flows. The smaller chips below lead to 3D AI, Masked edit, Remove background, AI Chat, Vision Board, UGC Ads, FH Shorts and AI Agents. All tools unfolds the rest. Some tools carry a small badge: BETA, ALPHA, NEW or SOON. Alpha and Beta tools work but are still being polished, and SOON means not yet.
Your first image in two minutes
Let us make something. There are two equally good ways to start. Pick the one you like.
Way 1: from the dashboard prompt box
- Click the Image mode button It is under the prompt box. The placeholder changes to "Describe the image...".
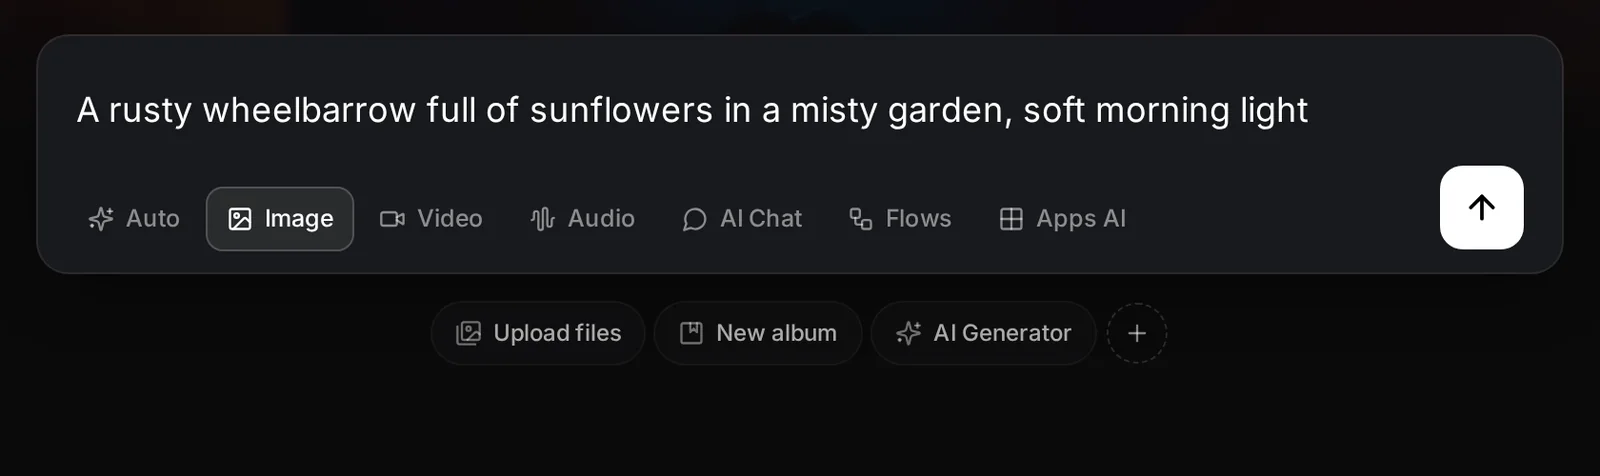
- Type what you want to see Describe one clear picture, as if you were telling a friend. For example: A rusty wheelbarrow full of sunflowers in a misty garden, soft morning light.
- Press the arrow button, or Enter The image generator opens with your sentence already in its prompt box. At this point nothing has been generated and nothing has been charged.
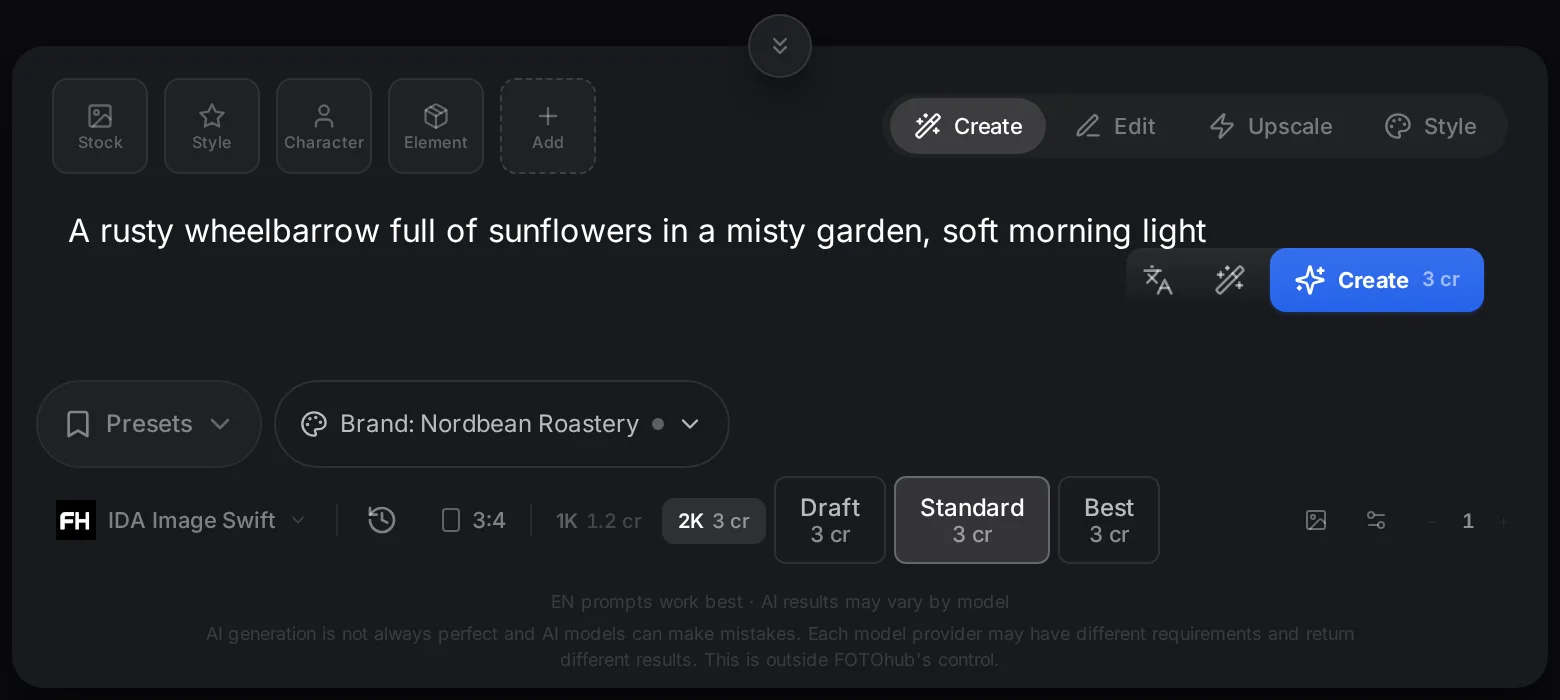
- Check the price, then press Create The Create button shows how many credits this image costs. Press it.
- Wait a few seconds A new tile appears at the top of your image history, marked as queued, then generating, and then your picture shows up.

Way 2: straight in the generator
Click Photos AI in the sidebar, or the Image AI tile on the dashboard, or the AI Generator shortcut. Type in the prompt box at the bottom of the page and press Create. Pressing Ctrl+Enter (Cmd+Enter on a Mac) also works, and Enter on its own adds a new line.
A first prompt that works
Goal. Make a clean product-style picture without knowing any AI jargon.
Input you can copy.
A rusty wheelbarrow full of sunflowers in a misty garden, soft morning light| Setting | Value |
|---|---|
| Model | IDA Image Swift |
| Images | 1 |
| Aspect ratio | 3:4 |
| Cost shown on Create | see the chip on the button |
Why it works. The prompt names one object (a wheelbarrow), what is in it (sunflowers), the place (a misty garden) and the light. Those are what the picture needs. A few concrete things matter more than a long list of adjectives. IDA models rewrite and tidy your prompt before they draw, so the text under the finished tile can differ a little from what you typed.
A tour of the image generator
The generator page has your history of images in the main area and a floating panel at the bottom where you write and set things up.
| Control | What it does |
|---|---|
| Create / Edit / Upscale / Style | The four modes at the top of the panel. Create makes a new image. Edit changes a picture you give it. Upscale makes an image larger. Style copies the look of a reference. |
| Stock, Style, Character, Element, Add | Square buttons for reference images: add your own pictures, stock photos, a style or a character so that the AI works from them. |
| Prompt box | Type here. Press Ctrl+Enter (Cmd+Enter on a Mac) to create, Enter alone adds a new line. |
| Create button | Starts the run. A small chip with the price in cr sits on it. Hover to see the details. |
| Presets and Brand | Saved settings, and the colours and style of a brand kit if you have one. |
| Model chip | Shows the engine in use. Click it to choose another. |
| Aspect ratio chip | The shape of the picture: for example 1:1 square, 3:4 portrait, 16:9 wide. |
| Draft / Standard / Best | A speed against detail choice, when the model supports it. |
| Gear icon | More settings for the chosen model. A small badge counts the values you changed. |
| - 1 + | How many images to make at once. |
Choosing a model
Click the model chip. A panel lists the models with a search box, filters for mode and price, and a price on every card. Type IDA in the search to see FOTOhub's own models. Each card says what the model is good at, how many images and reference pictures it takes, and what it costs.
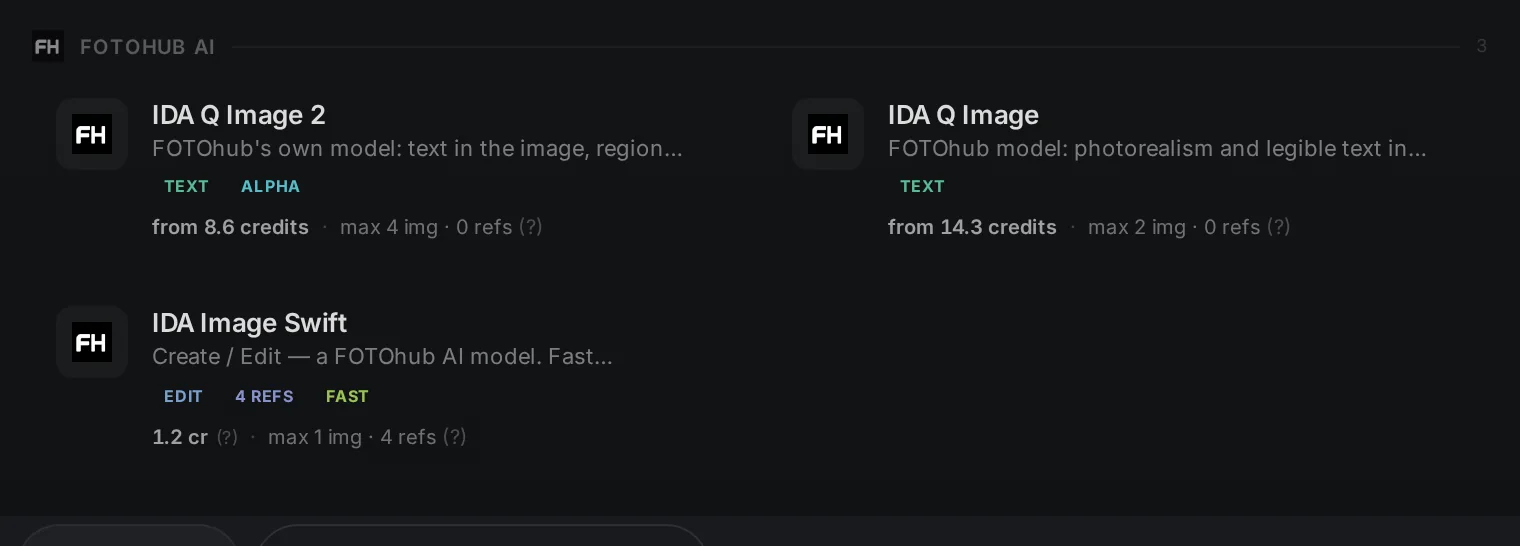
The price comes first
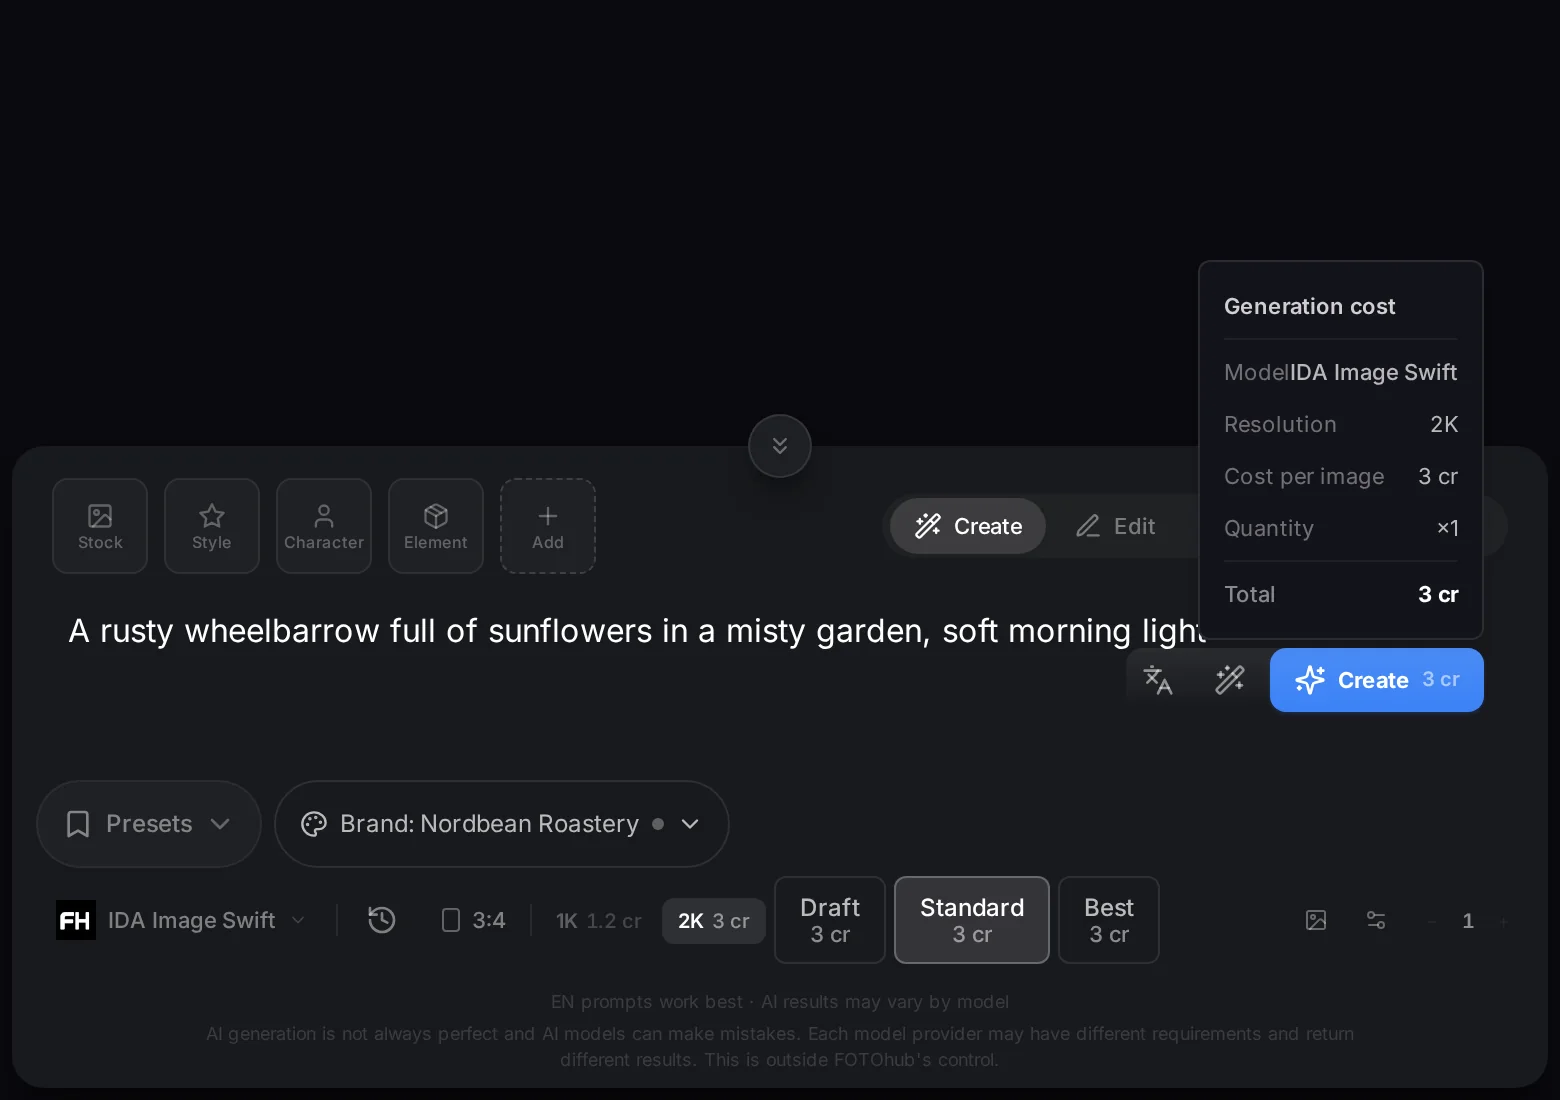
The chip on the Create button is the total for this run. Make four images and it shows four times the price of one. If you have too few credits left, the generator stops before it sends anything and says what to do. See the guide Plans and credits.
What to do with your image
Your picture is already saved in Photos, and it shows under Recent work on the dashboard. On the tile in the generator you can act on it straight away.
- Click the image to open it large. The panel shows the prompt, the model, the size, and buttons to copy the prompt, download and share a link.
- Download saves the file.
- Upscale makes it bigger and sharper, free of credits with the standard upscaler.
- Redo opens the generator with the same prompt and model, to try again.
- Continue with... sends the picture to another tool: edit it, put it on a poster, animate it. See the guide on Continue with....
Not happy? Change one thing at a time: the subject, the light, or the model. Keep the prompts you like. The clock icon in the panel remembers them.
Where everything is
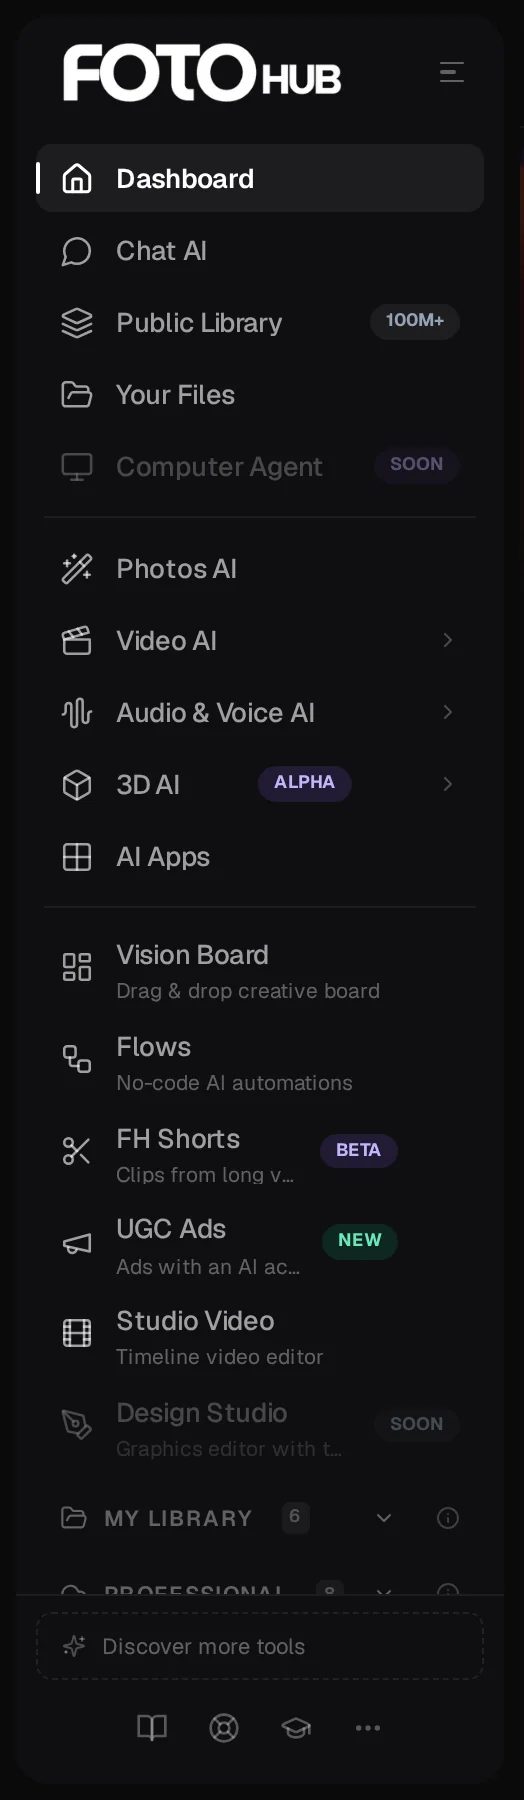
| I want to | Click |
|---|---|
| Make an image | Photos AI |
| Make a video from words or a picture | Video AI |
| Make music, sound effects or a voice-over | Audio & Voice AI |
| Ask a question or write text | Chat AI |
| Find my stuff | Your Files, or My Library with Photos, Videos and Albums |
| Browse photos and prompts for ideas | Public Library |
| Edit a video on a timeline | Studio Video |
| Use ready-made tools for posters, logos, mockups | AI Apps |
| Arrange images on a free board | Vision Board |
| Automate steps without code | Flows |
| See my credits, plan and settings | Your name at the top right, then Settings |
The next guide, Navigation and the dashboard, walks through the sidebar, the top bar, search and the language setting in detail.
What to read next
- Navigation and the dashboard: move around quickly and use the search.
- Plans and credits: what things cost and what happens when credits run out.
- Files, photos and albums: where your work is kept.
- Continue with...: chain tools without downloading.
- Using FOTOhub on your phone.
- Do I need a credit card to start?
- No. Signing up is free and no card is asked for. You pay only if you choose a paid plan or a Buster Pack.
- I did not get the email with the code.
- Check spam, wait for the countdown, then press Send a new code. You can also press Use a different email if you made a typo.
- Can I use FOTOhub in Polish or German?
- Yes. Open your name at the top right and use the Language row, or Settings, Profile, Interface language. The app starts in English.
- My picture does not look like my prompt.
- Describe one subject, the place and the light, and leave out negations. Try the same prompt in another model.
- Is my work private?
- Free and Starter plans save generations as public. Uploads are private by default, unless you switch them to Public.