Video Studio editor: edit, caption and auto-cut
Start a project from the Video Studio hub and edit it in the timeline editor with its media panel, captions, effects, AI Vision tools, Auto edit and Assistant, then export for TikTok, Reels, Shorts or YouTube.
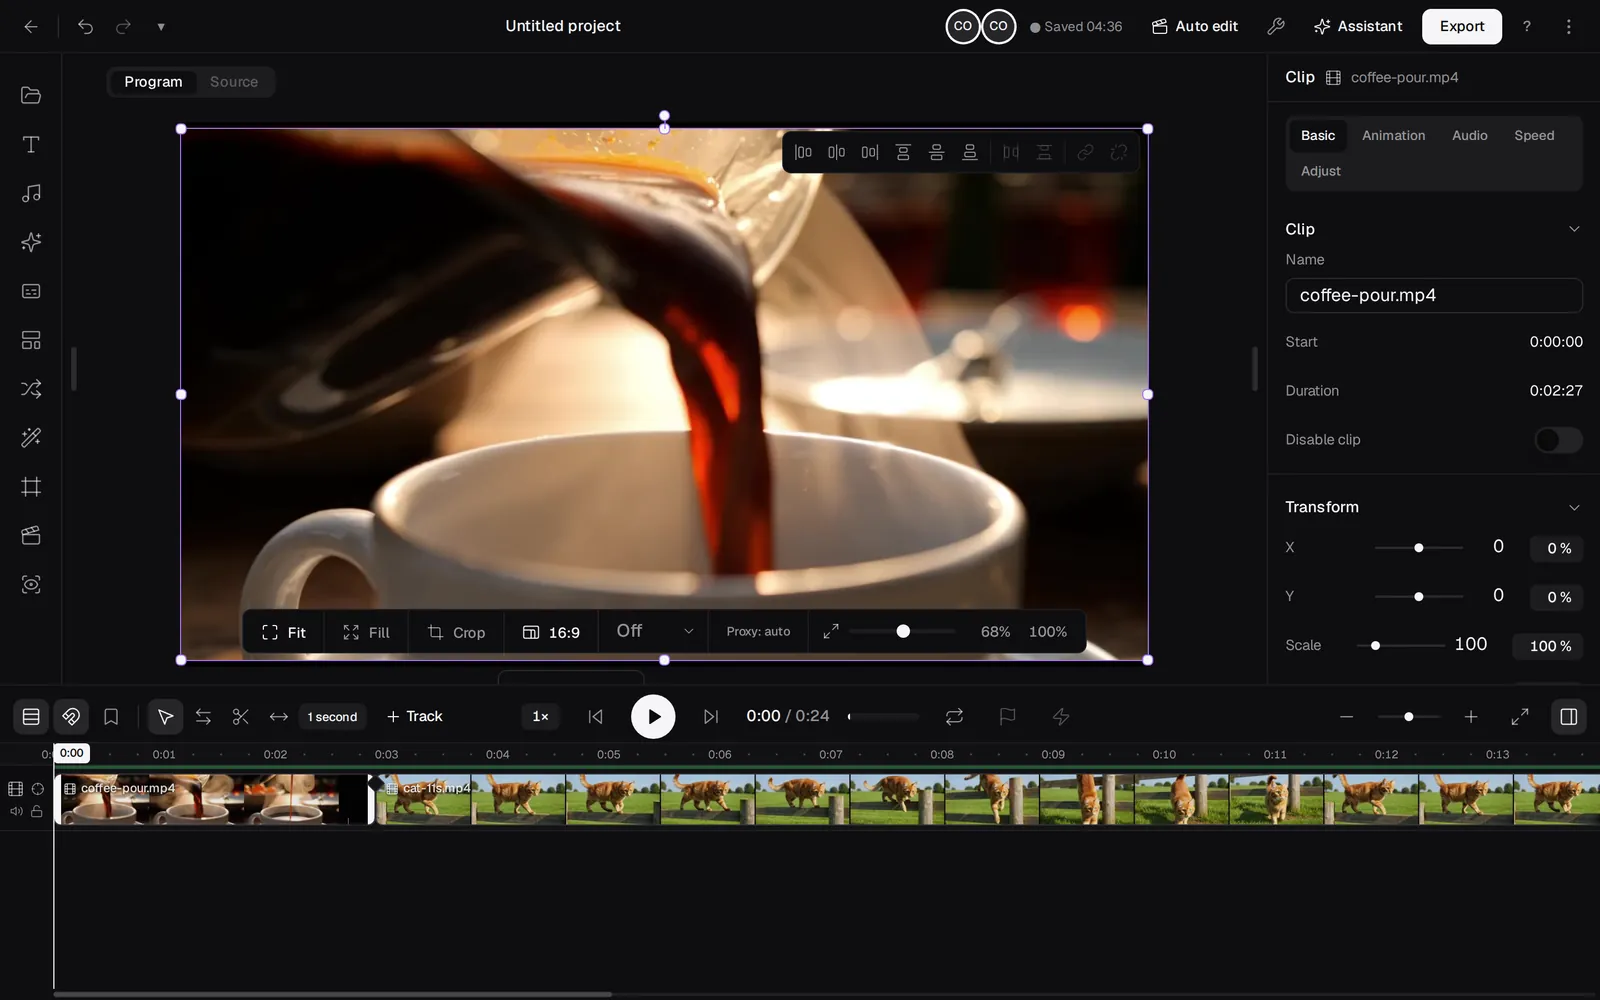
The editor behind Studio Video
Studio Video in the sidebar opens the Video Studio: your projects, exports and media in one place. Press New project there and you land in the Video Studio editor, a timeline editor with a media panel on the left, a preview in the middle, an inspector on the right and tracks below. It is built around speed: drop in clips, let Auto edit cut the silences and add captions, fine-tune on the timeline, export for the platform you are posting to.
| Video Studio editor | Video Editor Pro | |
|---|---|---|
| How you open it | Studio Video in the sidebar, then New project | Its own page, /fh/studio/video/pro |
| Strength | Auto edit, Assistant, captions with word-by-word styles, AI Vision tools, platform export | Large effect and animation libraries, templates, a classic project start screen |
| Project list | The Video Studio hub, with folders and exports | The Pro start screen and its project browser |
Start from the Video Studio hub
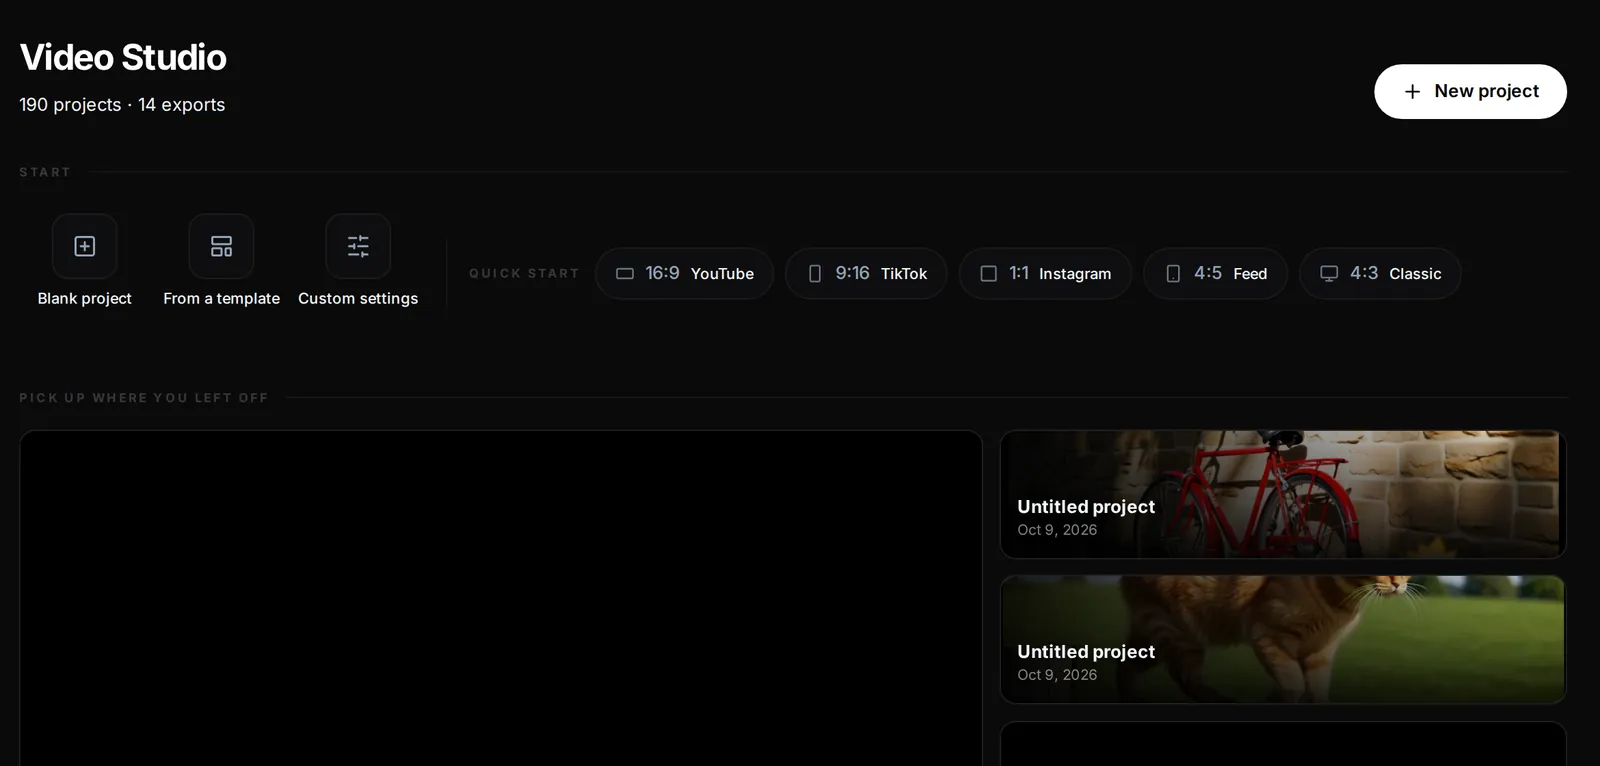
- New project: Blank project, From a template or Custom settings.
- Quick start: one click for a format, 16:9 YouTube, 9:16 TikTok, 1:1 Instagram, 4:5 Feed or 4:3 Classic.
- Pick up where you left off: your latest projects with Resume.
- Projects, Exports, Media tabs below, with search, grid or list view and folders (New folder).
A tour of the editor
| Rail tab | What it holds |
|---|---|
| Media | In this project, Library, Stock and Stickers, with Video, Image and Audio filters and a search box. Every video has Find moments, which searches its content. |
| Text | Styles (Title, Bold headline, Outlined headline, Geometric, Subtitle, Lower third, Clean caption and more), Animated text and an Edit section. |
| Audio | Music, Speech, Sound effects, your Library and a Mixer. |
| AI | Generate an Image or a Video from a prompt, or work with your Photos. |
| Captions | Transcribe speech or song lyrics, import SRT, and style captions. |
| Templates | Layouts by category (Social, Business, Personal, Education), and Save project as a template. |
| Canvas | Aspect ratio, frame rate, size and the project background. |
| Transitions | Select a clip next to a cut, then pick a transition. |
| Effects | Filters, LUTs and effects. |
| Vision | AI tools that work on a selected clip: select by description or click, cut out with hair, erase and fill, upscale, depth map, detect on-screen text, describe and tag, track an object and remove it from video. |
| Auto edit | Builds an edit from your footage in a chosen style. |
Above the timeline, Program shows your edit and Source shows a clip on its own. Fit, Fill and Crop control how a clip sits in the frame; the aspect ratio menu and a Safe area overlay (TV, TikTok, Reels or Shorts) help you keep titles clear of app buttons. Proxy: auto plays a lighter 720p copy of heavy files (HEVC, 10-bit, 4K) so preview stays smooth.
Your first edit
- Create a blank project In the Video Studio click Blank project. A getting-started card in the editor reminds you of the two steps: add a clip, then export.
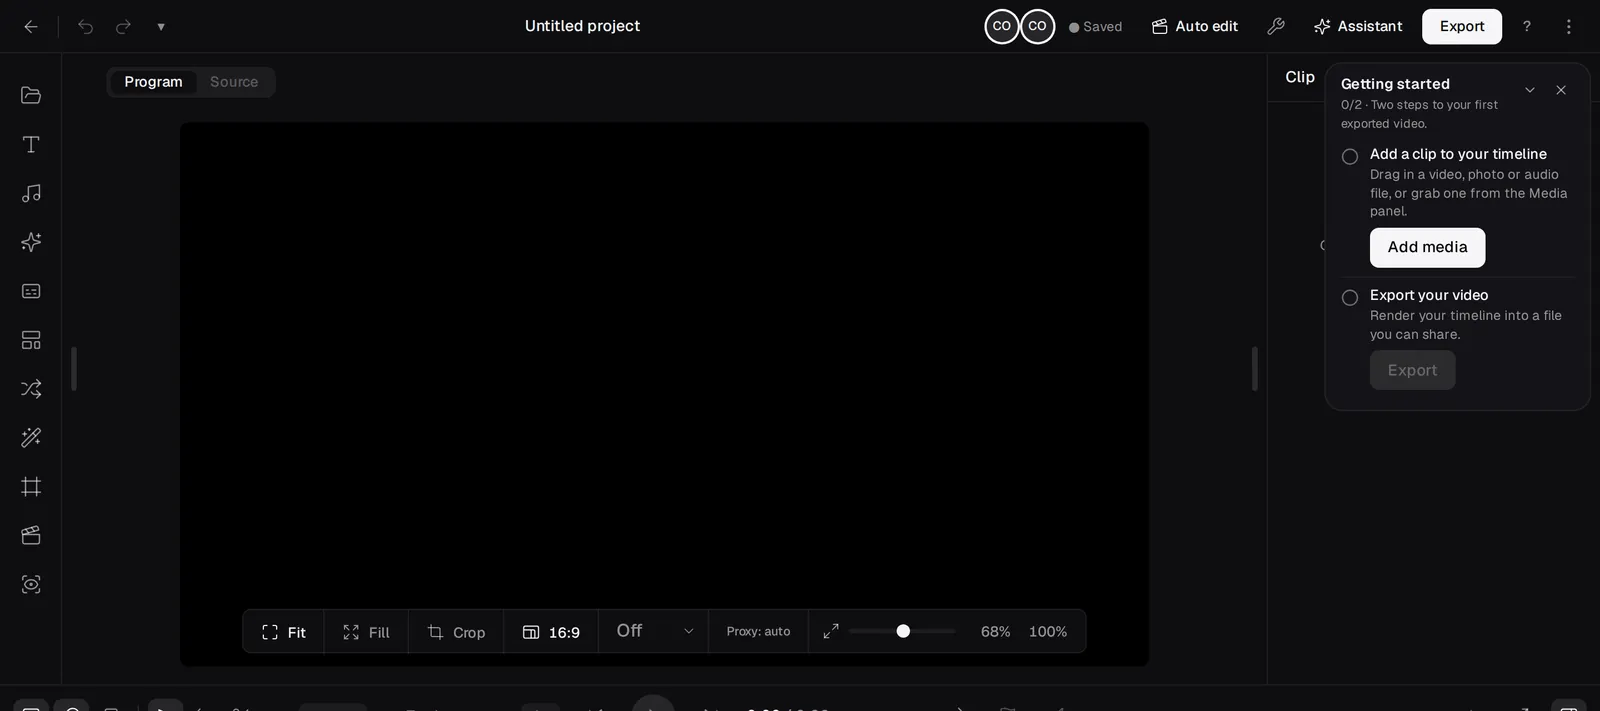
- Bring in media Click Add media, or drag video, photo or audio files from your computer onto the timeline. They appear under In this project. You can also drag a clip from your Library.
- Arrange on the timeline Drag a clip from the media panel into a lane. Dropping on empty space creates a new lane (“Drop to create a new lane”). Drag clips to move them, drag their edges to trim.

- Edit the clip Select a clip. The inspector on the right has tabs Basic, Animation, Audio, Speed and Adjust. Basic holds name, start, duration, Disable clip and the transform: X, Y, scale, rotation, flip and opacity, plus Fit, Fill, Crop and Blurred background for clips whose shape does not match the frame.
- Export Click Export and choose a platform preset.
The timeline
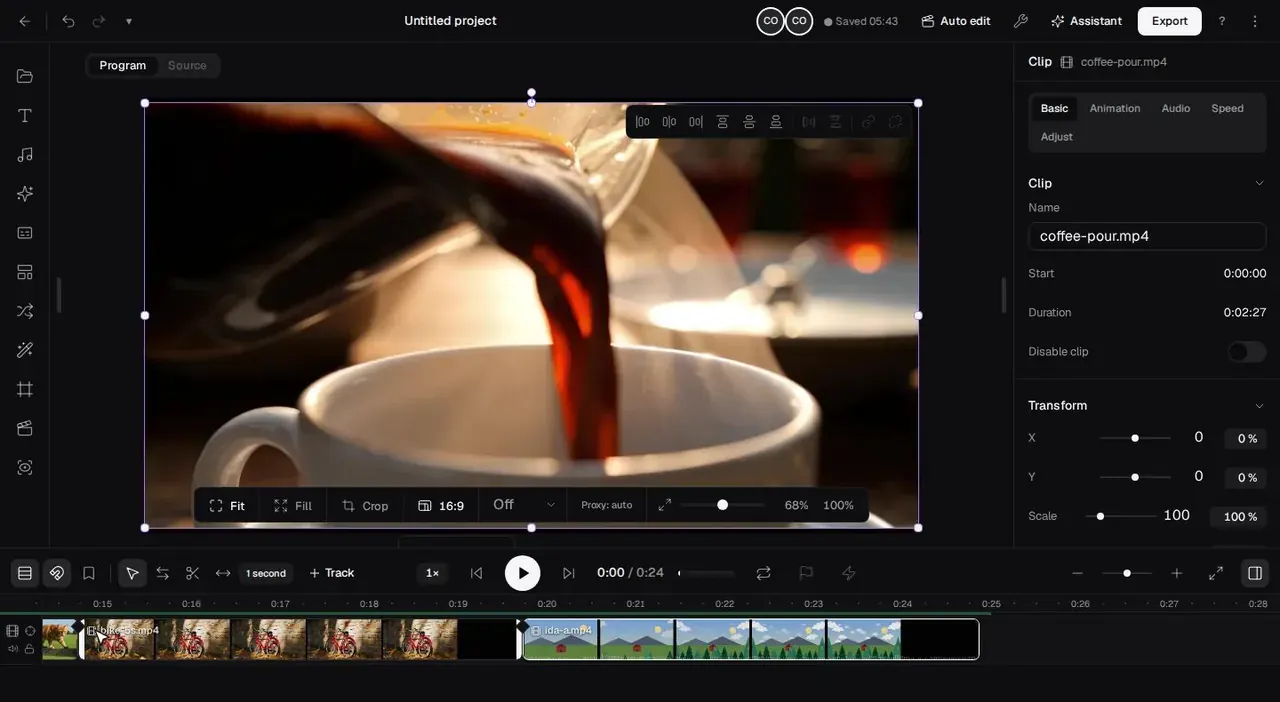
- Ripple: switch between Ripple: all tracks and Ripple: main only, so a deletion closes the gap on every lane or only on the main one.
- Snapping keeps edges aligned.
- Tools: Select (V), Roll edit (R), Slip (Y) and Slide (U). Roll moves a cut between two clips; Slip changes which part of a clip plays without moving it; Slide moves a clip and adjusts its neighbours.
- Step size: the menu that reads 1 second sets how far the Roll, Slip and Slide actions in a clip's right-click menu move it (1 frame, 10 frames or 1 second).
- Lanes: each has mute, solo, hide, lock and a volume control. Track adds a video track (overlay) or an audio track. A lane also has a Target track for insert and overwrite control.
- Markers and chapters: drop a marker, name chapters and jump between them.
- Right-click a clip for the full menu: Split, Delete (or Delete, leave gap), Duplicate, Join, Create compound clip, Detach audio, Freeze frame (2s), J-cut and L-cut, Auto-cut silence, Detect beats and Split at beats, Remove background, Remove object, Auto reframe, Extend video, and more.
| Shortcut | Action |
|---|---|
| Space | Play or pause |
| S | Split at the playhead |
| J / L | One second back, or play forward (faster at each press) |
| V / R / Y / U | Select, roll, slip and slide tools |
| Ctrl/Cmd+Z / Ctrl/Cmd+Shift+Z | Undo and redo |
| Ctrl/Cmd+S | Save |
| ? | Show all shortcuts |
Auto edit and the Assistant
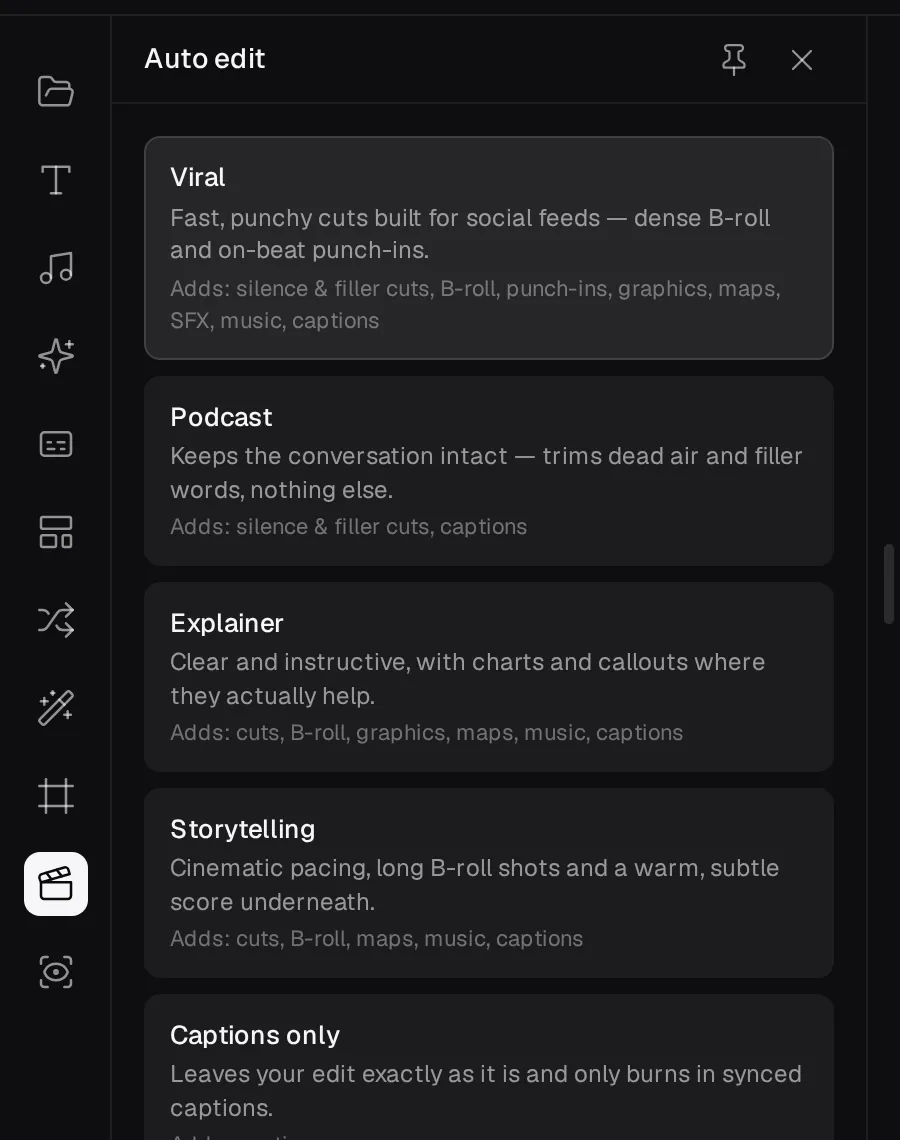
Auto edit is the fastest way from raw footage to a first cut. Choose a style, switch the helpers on or off, and let it work on the clips in your project.
| Style | What it does |
|---|---|
| Viral | Fast, punchy cuts for social feeds: silence and filler cuts, B-roll, punch-ins, graphics, maps, sound effects, music and captions. |
| Podcast | Keeps the conversation intact: trims dead air and filler words and adds captions, nothing else. |
| Explainer | Clear and instructive: cuts, B-roll, graphics and callouts, music and captions. |
| Storytelling | Cinematic pacing with long B-roll shots, maps and a warm, subtle score. |
| Captions only | Leaves your edit exactly as it is and burns in synced captions. |
Under the styles, switches control Cut silences, Remove filler words, B-roll, Punch-in zooms and Graphics. The Assistant is a chat panel for the project: choose Chat, Plan or Screenplay, and Fast or Precise, then tell it what to change. It builds a finished cut from your footage on request. It says plainly which things it cannot do yet, for example transitions and chroma key.
Captions, effects and Vision
- Captions: choose Speech or Song lyrics, set the Spoken language, click Generate, or Import SRT. Pick a style: Modern, Classic, Cinema, Karaoke, Bold box, Neon glow, Highlighter, Outline pop, Minimal, Comic, Word pop or Retro mono; or a word-by-word preset (Classic one word, Cascade, Spotlight, Paper, Pop and Stark). Highlight the key word and Add a matching emoji are switches, and you set position (top, centre, bottom) and font size.
- Effects: pick a filter (Cinematic, Dramatic, Teal & Orange, HDR, Bleach Bypass, Warm, Sunset, Golden Hour, Polaroid, Cool, Blue Hour, Infrared, Duotone Blue, Black & white and more), a LUT or an effect on the selected clip.
- Vision: select a clip, then choose a tool. These run on our own GPUs. Cut a person out with fine hair detail, erase an object and fill the gap, track an object through the video, or remove it from the video.
- Tools (top bar): run Slow Motion, Upscale, Face Restore, Colorize or Relight on the selected video, or open the Dubbing Studio for the clip. Each entry shows whether it is included in your plan or what it costs before it runs.
Export
Click Export. Give the video a name, choose a Platform preset (Custom, TikTok, Reels, Shorts, YouTube or X), then set Resolution (720p, 1080p, 2K or 4K), the Format and the Quality (Standard, High or Ultra). Aspect ratios lets you render several shapes in one run. A GIF is exported at 720p, the maximum for the format. The dialog shows the Estimated size before you start. When the export is rendered on the FOTOhub server it also shows an Estimated cost row (or Included in your plan). The dialog warns about effects that will look slightly different in the file, and lists anything that cannot be rendered.
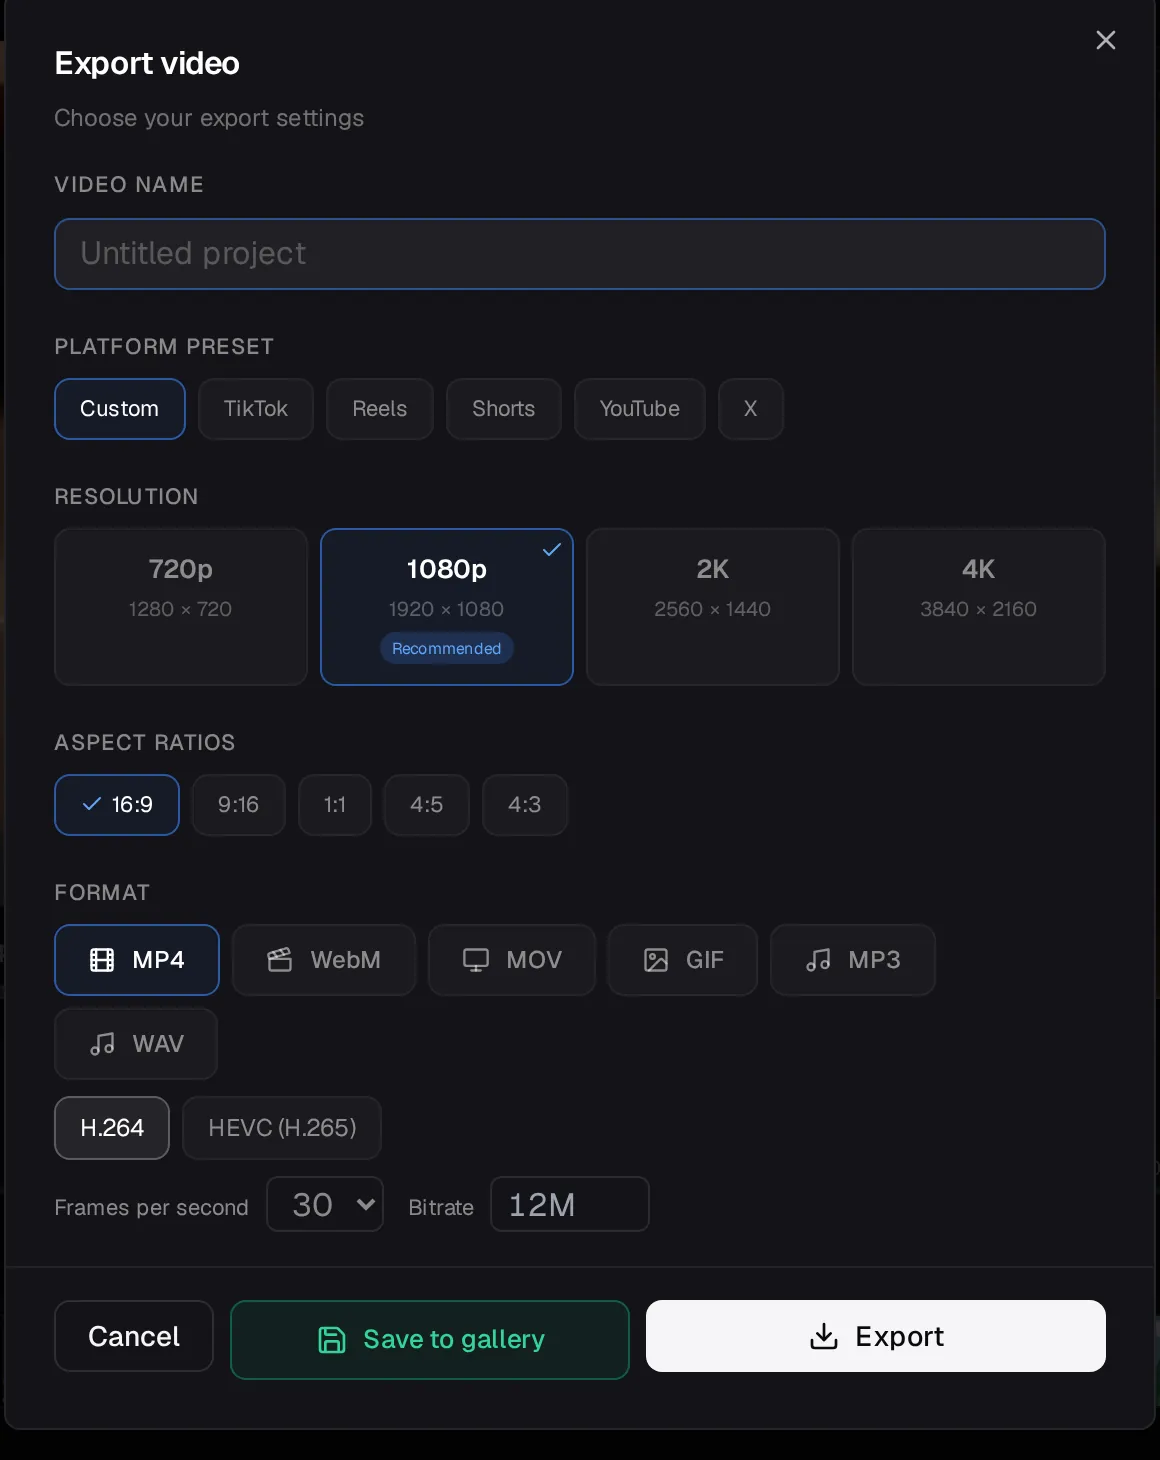
- Save to gallery keeps a copy in your library.
- Stop render cancels a running export. A failed export says whether credits were refunded or not charged.
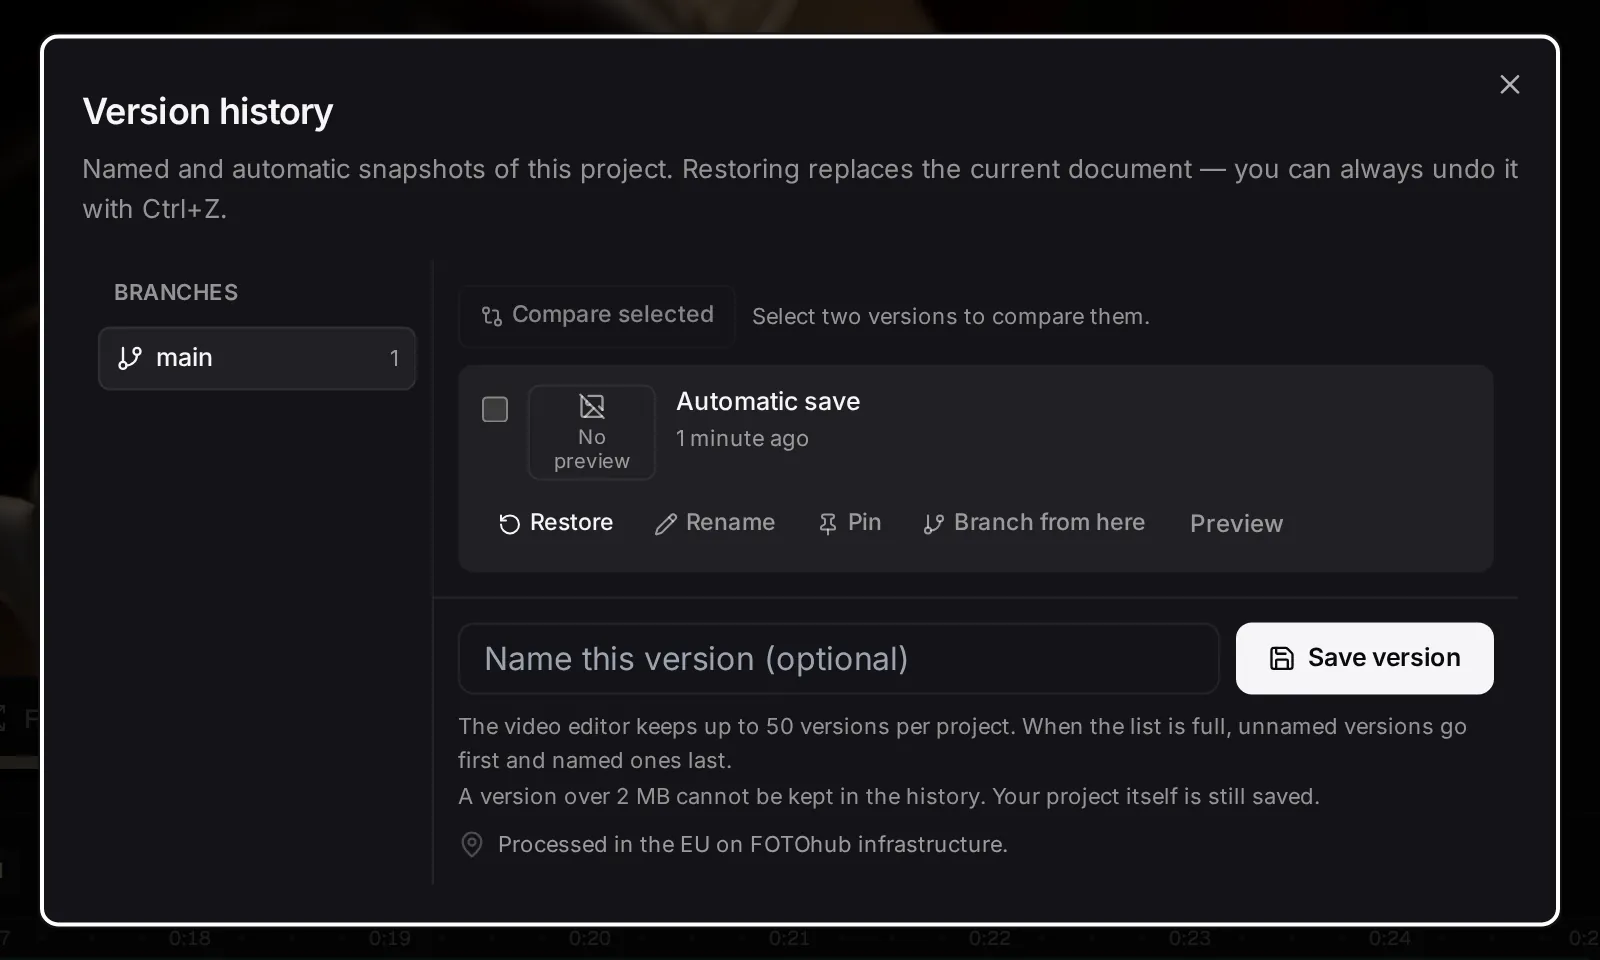
- Project menu (top right): Save, Version history, Share, Comments, Make a 9:16 version, Import/Export, Check project (lists problems), Use current frame as cover, Save frame as PNG or JPG.
- Where did my project go?
- Open Studio Video. Projects are listed on the Video Studio hub, and Resume continues the latest.
- A clip shows “File missing”.
- Use Locate file on the clip to relink it.
- The preview is choppy.
- Leave Proxy: auto on: it plays a 720p copy of heavy files while you edit. Export uses the original.
- Two tabs, one project.
- If another tab saved a newer version you are asked to load it or overwrite it. Your changes are kept as a version when you load the newer one.